New Breeze DSLR Remote Pro 3.8: simple, powerful branding

Breeze Systems is proud to announce the release of DSLR Remote Pro 3.8. Easier to use and more powerful than ever before, DSLR Remote Pro 3.8 includes two free button sets designed by Wilkes Booth Co.

Highlights of the new release

  • Fast simple branding for photo booth screens
  • Create and save new photo booth screen themes
  • Transfer themes between PCs
  • Free sets of touchscreen buttons
  • Create custom caption sets in any almost language
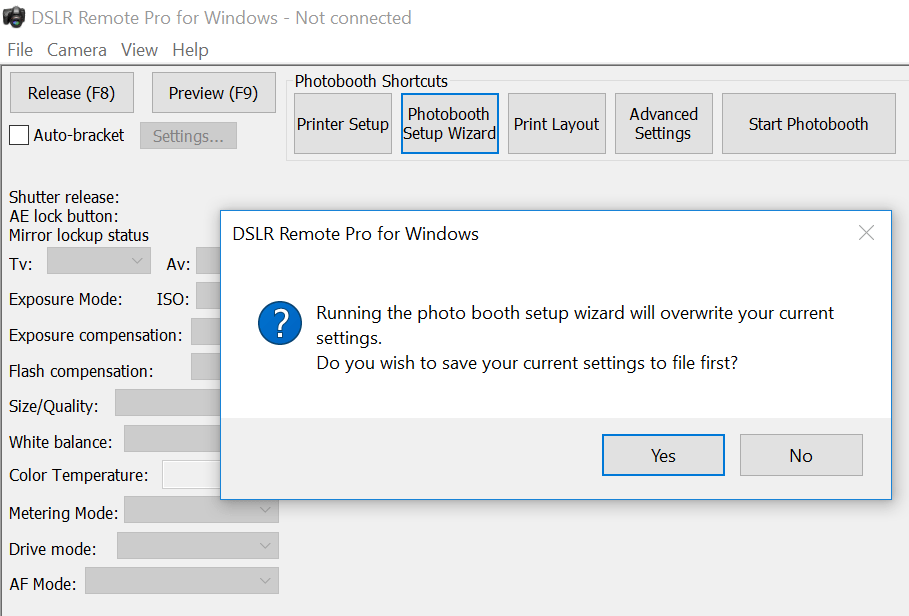
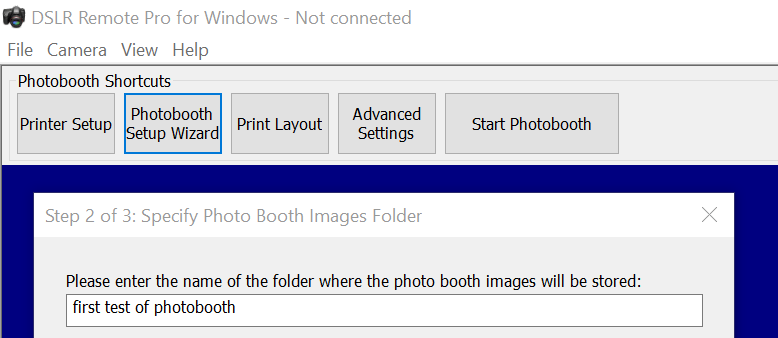
  • Photobooth Setup Wizard now simplifies screen customization
  • Animated backgrounds for green screen boomerang GIFs
  • Support for Canon’s EOS  6D Mark II

Fast, powerful branding for photobooth screens

Brand screens quickly and easily with new DSLR Remote Pro themes

Create themed photobooth screen sets

Create, load and save DSLR Remote Pro themes containing screen background, touchscreen button, and caption sets

DSLR Remote Pro 3.8 theme including (A) screens, (B) buttons & (C) captions

A. Complete sets of custom photo booth screen backgrounds  can now be generated from a single image. The same background image can be tiled, stretched or cropped to fit any screen with new themes

DSLR Remote Pro 3.8 single background_tiled.jpeg image used to create themed set of background screens

B. Create your own buttons or choose from those shipped with DSLR Remote Pro 3.8. Touchscreen buttons can be placed below the image or to one side using the Setup Wizard. 

C. Customize captions in almost any language. Adjust the color of your text.

Transfer themes between PCs

To generate themed screens on PCs with different screen size/aspect ratio by just copy the theme to the new PC and run the Photobooth Setup Wizard.

Free touchscreen button sets

Breeze DSLR Remote Pro 3.8 includes 2 new free button sets created by  Wilkes Booth Co

DSLR Remote Pro 3.8 Welcome screen: Wilkes Booth Co Tradewind White buttons
DSLR Remote Pro 3.8 Sharing screen Wilkes Booth Co Tradewinds Blue buttons
DSLR Remote Pro 3.8 Sharing screen: Wilkes Booth Co Tradewind Blue buttons

Buy Breeze Wizard themes or complete interface designs for DSLR Remote Pro 3.8 from Wilkes Booth Co

Choose whether to run buttons across the screen or to the side using the Photobooth Setup Wizard.

Create custom caption sets

Breeze software is used in over 80 countries world wide. DSLR Remote Pro already supports Unicode and handles characters in most languages. Use the Photoboth Setup Wizard to create reusable caption sets, and apply them to different themes.

DSLR Remote Pro 3.8 is shipped with English, German, Polish, Italian and Romanian captions.

Thanks to Jürgen Mayr (Photobooth-deluxe), Tomasz Klusczyk (Smove), John Bonardo (Babooth), and Dan Neamtu (Mirror Magic), for providing the German, Polish, Italian and Romanian caption sets shipped with DSLR Remote Pro 3.8

Brand and customize screens with the Setup Wizard

  • Change screen and keyboard background color at the touch of a button
  • Generate complete screen sets from a single background image
  • Automatically  tile, stretch or crop images to fit any size of screen
  • Create and save customized caption sets
  • Save touch screen button sets
  • Choose buttons running down the side or across the bottom of the screen

Improved animated GIF support

  • New Animated backgrounds for green screen boomerang GIFs
  • New support for animated GIFs in sharing screens (email, text, Facebook and Twitter)

More new features

  • Useful shared print counter for events
  • Send emails with or without image attachment
  • Enhanced ability to pass information to microsites
  • Tap for speedy countdown
  • Default delay before taking first photo reduced to 5 seconds

DSLR Remote Pro 3.8 is a free upgrade for all registered users who purchased a license on or after 29th November 2016.

Download  DSLR Remote Pro 3.8       Buy your own license


DSLR Remote Pro Multi-Camera on location

This awesome video which used DSLR Remote Pro Multi-Camera was shot in 2012. It is still a favorite..

Thanks to Splice Boys Richard Kendall for allowing us to share this video with you. You can see more of their work here.

Find out more about DSLR Remote Pro Multi-Camera

Auto focus blues & how to cure them

Canon’s DSLR cameras can be set to auto focus (AF)  or manual focus (MF). The auto focus setting is very convenient for photo booth operators, but when the camera cannot find anything to focus on it will not take a photo.

This post was originally written for DLSR Remote Pro 3.7.3 and last updated to include more recent camera models  in October 2022

What can go wrong using auto focus?

You may notice a long pause before the camera takes  a photo. The focus motor whirrs and the camera lens moves as the camera tries to focus. Two different error messages may be displayed: ‘Unable to release shutter’ or ‘Unable to focus’.

Unable to release shutter

When setting up the booth the operator presses Release(F8)  or Preview (F9) to check camera operation. No photo is taken and this error message is displayed:

Error message for DSLR Remote Pro 3.7.3 displayed: Unable to release shutter. This may be because the AF was unable to lock
DSLR Remote Pro 3.7.3 ‘Unable to release shutter’ error message

Unable to focus

After the countdown there is a long pause before the camera takes  the first photo. The focus motor whirrs and the camera lens moves as the camera tries to focus. Eventually this message* is displayed:

DSLR Remote Pro 3.7.3 error message 'Unable to focus! If you are standing close to the camera please try moving back a bit. The booth will retake the photo in ... seconds...
DSLR Remote Pro 3.7.3 ‘Unable to focus!’ error message *

*Hint (localization) You can translate this message into your local language using the PhotoboothAfErrorMsg message in the configuration files

Why does this happen?

Usually the camera cannot focus because

  • there is not enough light
  • the booth is empty and has a plain background
  • guests are too close to the camera
  • the lens cap has not been removed

Autofocus works best with good lighting and guests positioned at the right distance from the camera. It may be improved by changing from a plain background. The most reliable solution is to switch the camera to manual focus.

How to make sure the camera will fire: Set the camera to manual focus

Exception : cameras with dual pixel AF. If your camera has dual pixel AF please see the Camera Settings section of the program help files.

At present (October 2022) the Canon EOS  cameras with dual pixel AF we support are:

  • R Series : EOS R, RP, R5, R6, R7, R10
  • M series: M6 Mark II, M50 Mark II/EOS M50M2/Kiss M2, M50, M200
  • DSLR models: EOS 800D/Rebel T7i, 200D/Rebel SL2, 90D, 70D,  77D, 80D, 7D Mark II, 5D Mark IV and 6D Mark II.)

Simplest way to set the camera to manual focus

  1. Set the AF/MF switch on the camera lens to the MF (manual focus) position.
  2. Each time you set up the booth turn the focus ring on the camera lens until you see a sharp image on the PC live view display.
Photo of Canon REBEL T5 camera how how to switch between auto and manual focus
Canon REBEL T5 (1200D) showing AF/MF switch
Photo by Kārlis Dambrāns (edited to highlight AF MF switch)

Photo sourced from Flickr

Use the camera controls to set manual focus

Use the screen on the back of the camera to set the custom function “C.Fn IV: Operations/Others – Shutter/AE lock button” to “1:AE lock/AF” (refer to your camera manual if necessary).

Canon 200D camera display showing Customer Function IV
Customer function IV screen on Canon EOS 200D camera

This setting has the advantage that focus can still be adjusted remotely from the PC but auto focus won’t be used when taking a photo. The lens can be focused in fullscreen photobooth mode by typing Ctrl+A.

For more precise control of focus exit photobooth mode and type Ctrl+L to display the live view window. Then use the <<<, <<, <, >, >>, >> buttons or the mouse wheel to manually adjust the focus.

If you found this post helpful please share it with others.

Try out DSLR Remote Pro                         Breeze Systems website

Copyright Breeze Systems 2022

Getting Started DSLR Remote Pro (1): Photobooth Setup Wizard

This is the first of a series of posts explaining how to setup your photo booth using the DSLR Remote Pro 3.7.3 Photobooth Setup Wizard.

Getting Started with DSLR Remote Pro (2) will explain how to customize your prints. Getting Started with DSLR Remote Pro (3) will explain how to customize your screens.

Downloading the program

First download DSLR Remote Pro from our website; and install the program on your computer. You can run the program as a free trial for up to two weeks from the day you download it.

Screen shot downloading DSLR Remote Pro 3.7.3
Downloading DSLR Remote Pro 3.7.3 from http://breezesys.com/downloads.htm#dslr

Start the program. If you are running a trial version of the program you will see the registration window each time you start. Click on Evaluate.

DSLR Remote Pro 3.7.3 registration dialog

There are five buttons at the top of the main screen. They are shortcuts to the most used parts of the program.

DSLR Remote Pro 3.7.3 Photobooth Shortcut buttons
  • Printer Setup
  • Photobooth Setup Wizard
  • Print Layout
  • Advanced Settings
  • Start Photobooth

First connect your printer to the computer and switch it on. You can also connect and switch on your camera now; or use the ‘simulated camera’ at this stage.

Select Printer Setup to tell DSLR Remote Pro about about the printer you intend to use. Choose prints in Portrait or Landscape orientation.

Hint: Portrait is used for narrow strips of 3 or 4 photos, unless you have a DNP printer.

DSLR Remote Pro 3.7.3 Printer Setup screen showing Landscape oriented 6″ x 4″ print layout (non DNP printers)

Hint: For DNP printers using 6″ by 4″ media portrait and landscape orientation are swapped.

DSLR Remote Pro 3.7.3 Printer Setup screen showing Landscape oriented 6″ x 4″ print layout ( DNP printers only select ‘Portrait’ instead of ‘Landscape’)

Finish by clicking on OK.

Now start the Photobooth Setup Wizard. The program will prompt you to save any existing settings before the wizard overwrites them

DSLR Remote Pro 3.7.3 check at start of Photobooth Setup Wizard

At Step 1 you choose the photo layout you need. The wizard offers a choice of 8 popular layouts; if you want something different choose whichever is closest to your design (you will be able to change this later).

DSLR Remote Pro 3.7.3 Photobooth Setup wizard step 1. Landscape layout with 1 large and 3 small photos

Next Step 2. Tell the program which folder to save the photo booth photos you are going to shoot.

DSLR Remote Pro 3.7.3 Photobooth Setup Wizard Step 2

Finally choose the options you want to offer your guests.

  • The first 5 check boxes tell the Wizard whether you are using a touchscreen, whether guests can choose between color and B&W prints, whether to display a preview of each photo after it is taken and the maximum number of prints allowed.
  • The next five check boxes tell the wizard whether a sharing screen (after the photos are taken) should offer uploads to guest’s Facebook and/or Twitter account, share photos by email or MMS/SMS, or offer optional printing. Hint: some operators prefer to offer browsing and sharing from a kiosk separate to the booth. You can use Breeze Kiosk for this. To share and print photos away from the booth leave these boxes unchecked.
  • Beginners should leave  ‘Add a background.jpeg’ blank at this stage. Print layouts can be branded/customised later.
  • To offer ‘boomerang’ animated GIFs check ‘Enable videobooth..’ and  ‘Capture Boomerang GIFs..’.
  • To offer video booth check ‘Enable videobooth..’

Click on <Finished> and you will see a final screen reminding you where the screen and print layouts created by the wizard have been stored; and where photos taken today will be stored.

DSLR Remote Pro 3.7.3 Photobooth Setup Wizard completed

Close this window, connect your camera and switch it on before selecting ‘Start Photobooth’. That’s it!

DSLR Remote Pro 3.7.3 default photo booth screen created by the Photobooth Setup Wizard

Customise your screens  Customise your prints

Buy DSLR Remote Pro

Copyright Breeze Systems 2017


Photo Booth Show 2017 Round Up

Thanks to all who came to the stand and listened to Chris’s presentation at the first UK Photo Booth Show. We had an amazing time catching up with old friends and making new ones.

The Breeze stand focused on three industry trends: animated GIFs, 3D activations, and magic mirrors.

DSLR Remote Pro appeared in multiple guises on several stands. It was beautifully complemented by a Wilkes booth and ran the magic mirrors on our own stand and at I Love Photobooth; partnered with Breeze Kiosk at Everybooth; and powered green screen software at Incredible Booth.

Andrew Bliesner’s professionalism, knowledge of our software and willingness to share his experience and tips with visitors was fantastic.  The screen and GIF designs were adapted from Breeze Themes at Wilkes Photobooth ‘The Lab’. Thanks Andrew and Steve!

Activations creating 3D GIFs are are increasingly popular; and Breeze software is trusted by many industry leading operators to provide ‘bullet time’ animated GIFs.

Multiple images are taken using DSLR Remote Pro Multi-Camera, automatically combined into an animated GIF, and shared using Breeze KioskHotfolder Prints was used to provide visitors with a printed takeaway.

Samuel Waters‘ video shows just how fast this process is:

Thanks to Matt at Noonah for lending us the multi-camera rig in this video. You can buy your own multi-camera system powered by DSLR Remote Pro Multi-Camera from Noonah.

I Love Photobooths kindly lent us the magic mirror running DSLR Remote Pro to show on the stand. Purchase the complete magic mirror from I Love Photobooths (their Green Screen Dream Machine and Hashtag Printers also run Breeze software).

Missed Chris’s talk on light painting? Much of the content is covered here

Chris demonstrating light painting props at Photo Booth Show 2017 (Photo by Peter Leese Everybooth)

Interested in multi-camera activations? Download a copy of DSLR Remote Pro Multi-Camera and try it for yourself. Chris will also be giving a presentations about multi-camera systems at PBPI in January and PBX 2018 in March.

A big thank you to Jon Sharp for organising the show.

Find out more about I Love Photobooths, Noonah, Photobooth Guys Andrew and Steve , The Lab, Wilkes, Everybooth, Incredible Booth

Copyright Breeze Systems 2017