This tutorial explains how to shoot portrait oriented photo booth images with Breeze DSLR Remote Pro aka Booth (DSLR + Windows).
Introduction
There are 3 different parts of your system which can be orientated in landscape (horizontal) or portrait (vertical). DSLR Remote Pro lets you have any combination of these. They are
- Camera
- Screen
- Outputs ( prints and GIFs)
Most photo booths use a landscape/horizontal orientation for both screen and camera, with room for lots of people in the photo. The default for DSLR Remote Pro is to do the same. If you want to shoot in portrait orientation, you need to make some simple changes to the way DSLR Remote Pro runs, and turn the camera through 90 degrees.
Tell DSLR Remote Pro the camera is shooting ‘portrait’ orientation
Mount your camera in portrait orientation, and start DSLR Remote Pro. Click on View and then Portrait (90 degrees CCW) or Portrait (90 degrees CW):
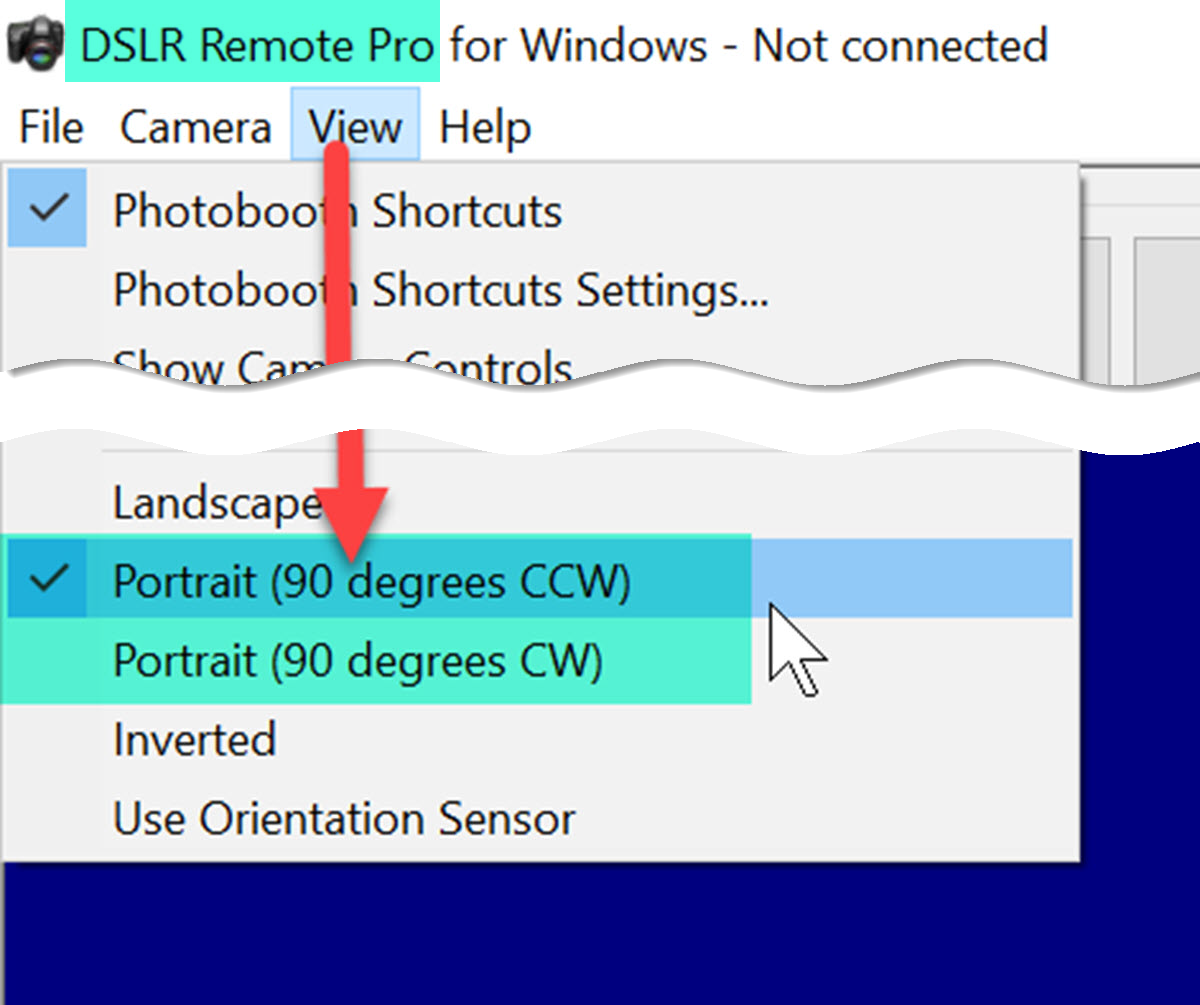
Telling Breeze DSLR Remote Pro that the camera is shooting portrait & whether rotated clockwise (CW) or counter clockwise (CCW)
Portrait and landscape oriented screens
You can run DSLR Remote Pro with both screen and camera in portrait orientation. Magic mirrors are usually set up this way. You can also shoot portrait photos with the booth screen in landscape.
Portrait oriented photo booth, shooting portrait images (Breeze DSLR Remote Pro 3.15.1)
Landscape oriented photo booth also shooting portrait images (Breeze DSLR Remote Pro 3.15.1)
The simplest way to create a set of screens in the correct orientation is to
- Setup the monitor/screen in portrait or landscape mode
- Start DSLR Remote Pro* and use the photo booth setup wizard to create the screens
*If you have more than one screen, move DSLR Remote Pro to the screen used for the booth
When you run the Setup Wizard, DSLR Remote Pro creates a set of screens which fit the current window. When the screen is in portrait, the wizard builds a set of portrait oriented screens.
More on screen design
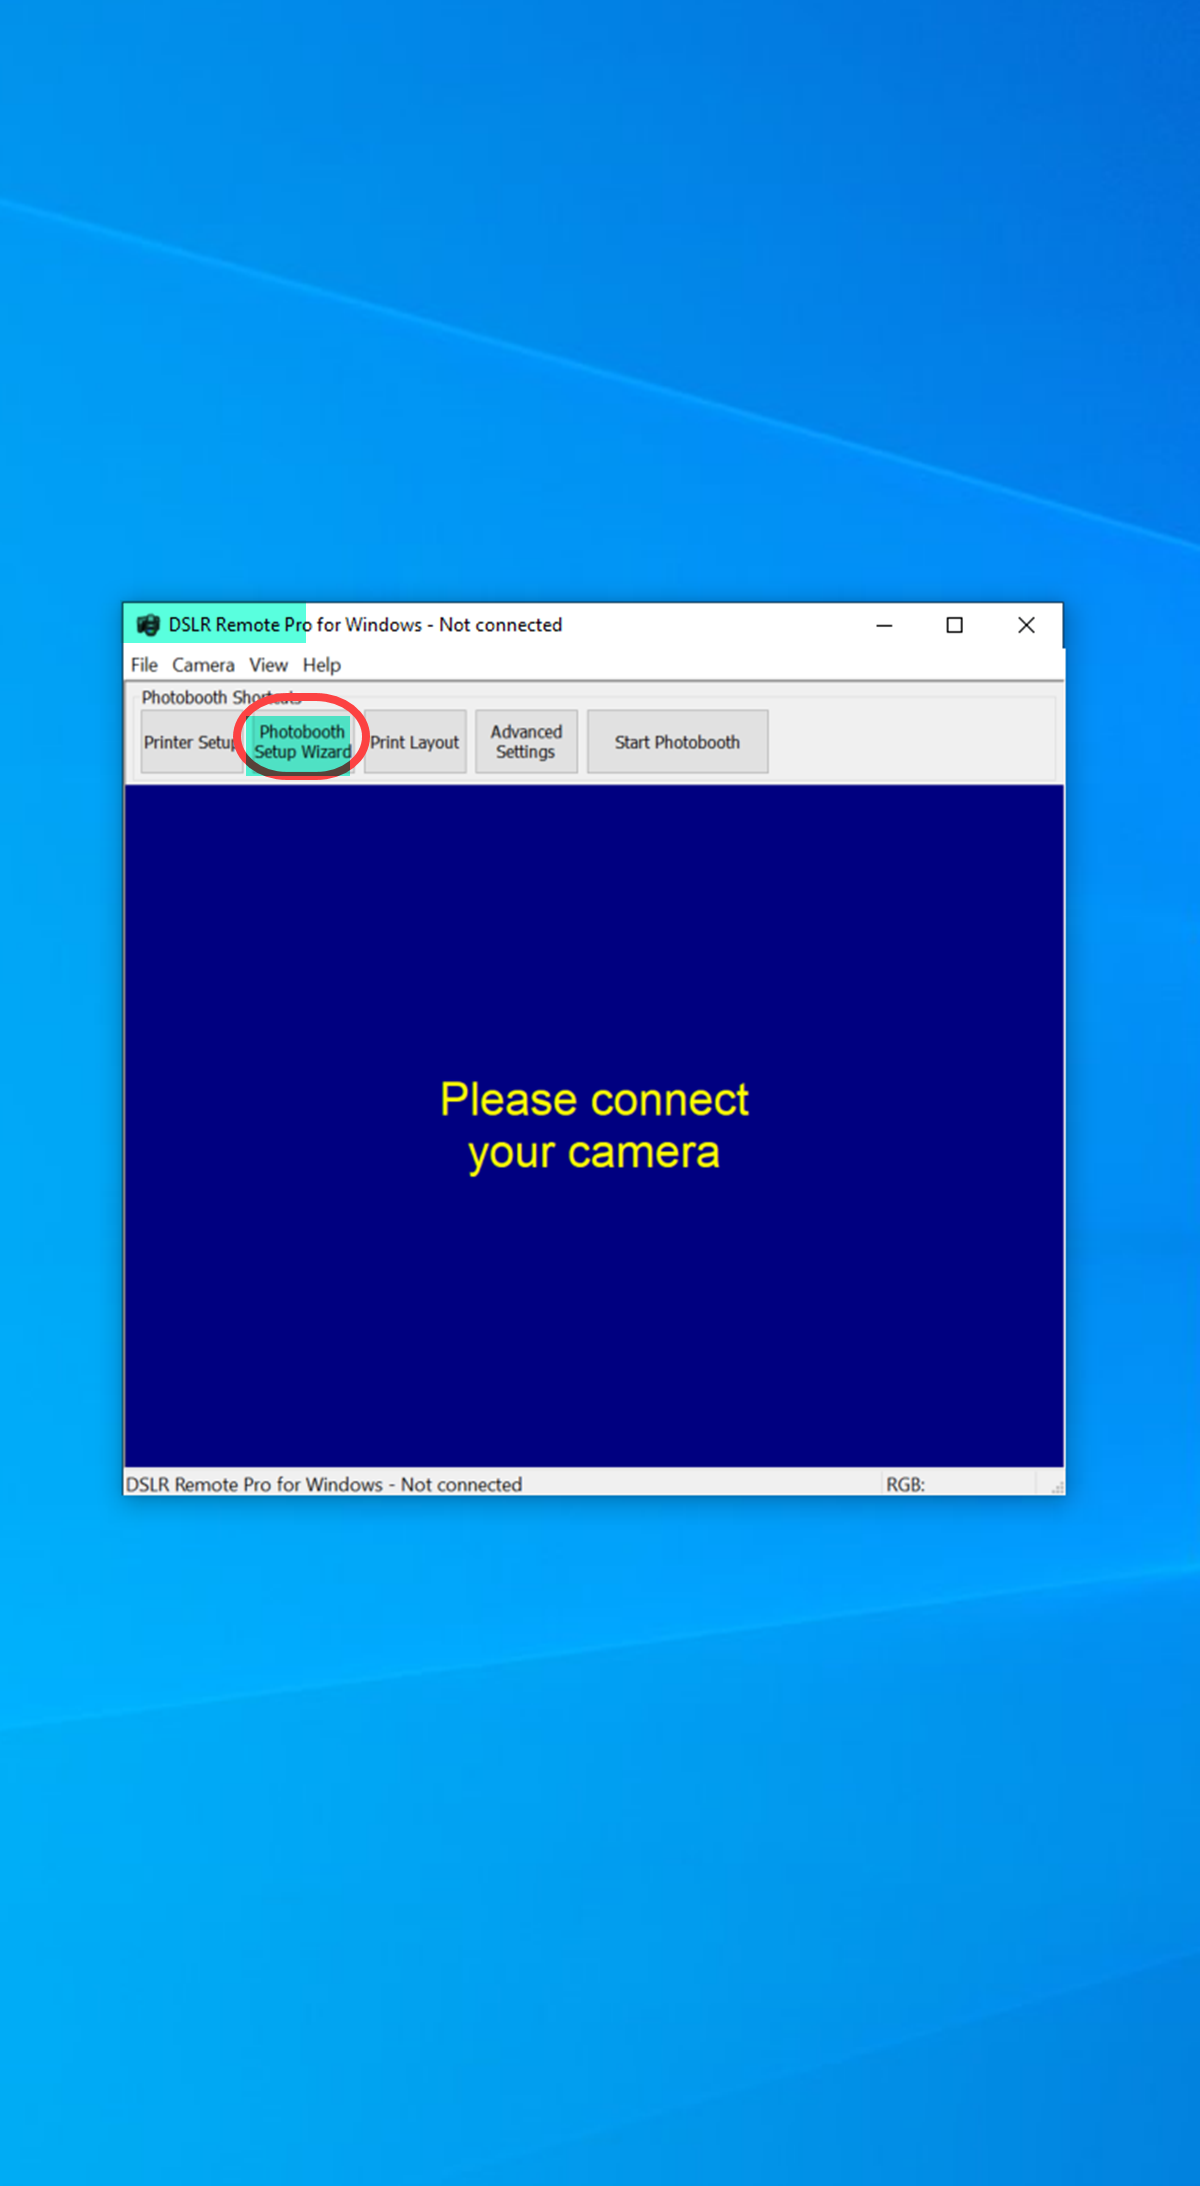
Run the Photobooth Setup Wizard
The setup wizard will automatically create a set of photo booth screens with the correct aspect ratio for the current screen.
- When the monitor is in landscape, the wizard creates a set of landscape oriented screens.
- When the monitor is in portrait, the wizard creates a set of portrait oriented screens.
Run the Photobooth Setup Wizard. At Step 2 you can choose the live view display:
Normal 3:2 sets the booth up with a portrait oriented live view without cropping the image
Ready screen with ‘normal’ uncropped live view (Breeze DSLR Remote Pro 3.15.1)
Use full screen live view with a portrait oriented screen for a larger portrait oriented live view.
Note: When you choose full screen live view, the wizard automatically crops the images on your prints to match the shape of the screen.
Ready screen with ‘full screen’ live view (Breeze DSLR Remote Pro 3.15.1)
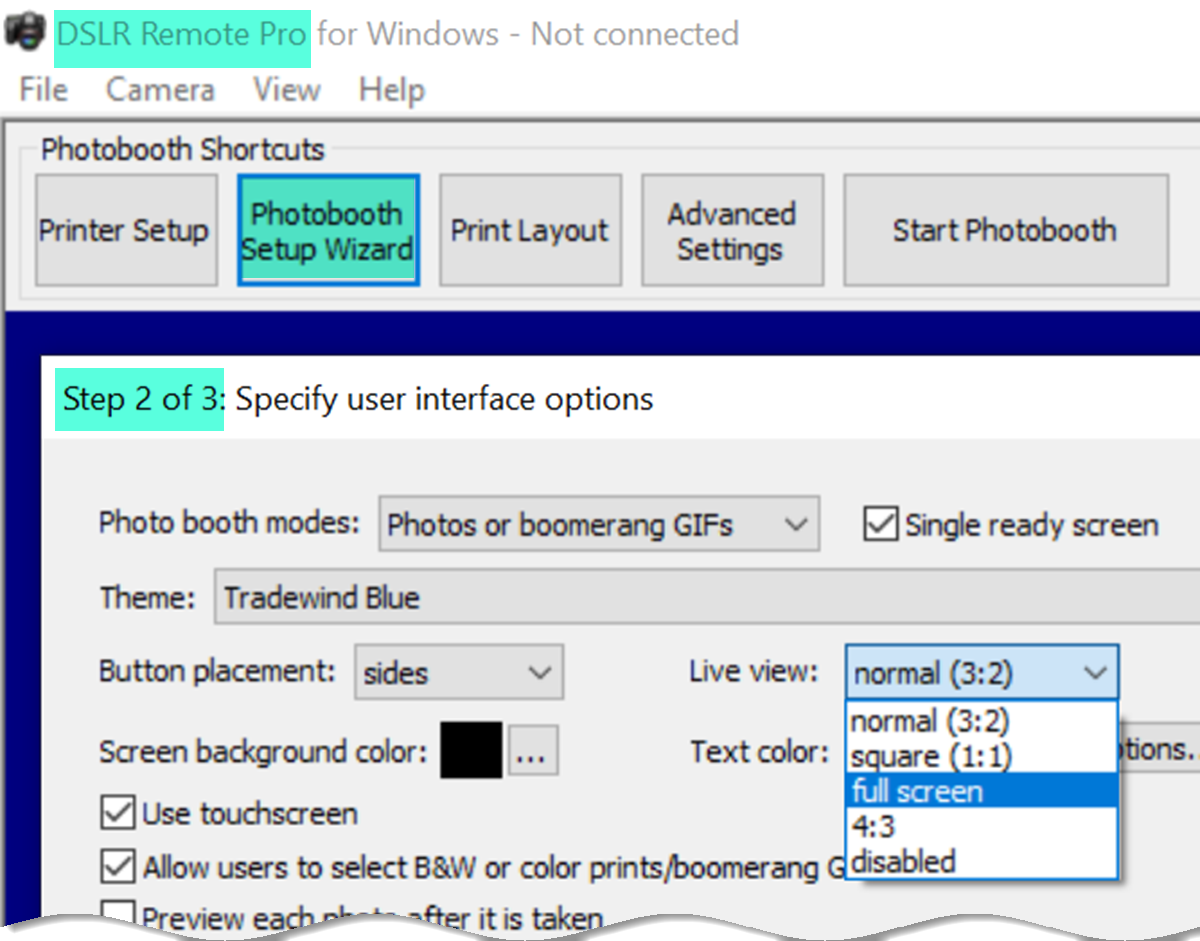
Normal 3:2 displays a portrait oriented live view without cropping the image. Full screen live view fills the screen, printed images have the same aspect ratio (Breeze DSLR Remote Pro 3.15.1 Photobooth Setup Wizard)
Adding a live view overlay to the Ready screen (optional)
When adding an overlay to your Ready screen, use a landscape oriented live view overlay (usually 960 by 640 pixels).
This is necessary because the live view overlay is applied before the image is rotated. Portrait oriented live view overlays may appear distorted on screen.
Running a touch free booth in portrait
If you are running contactless and scanning QR codes with a web camera, you may want to adjust the position of the web camera live view on screen. When QR codes are scanned by the booth camera, you can skip this.
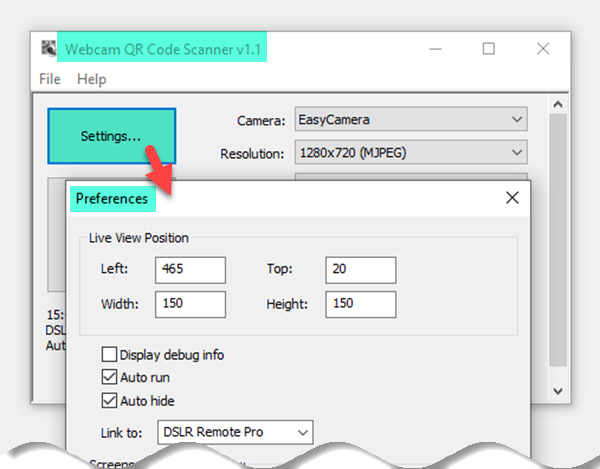
Webcam QR code scanner showing live view position and size (Breeze Webcam QR Code Scanner 1.1)
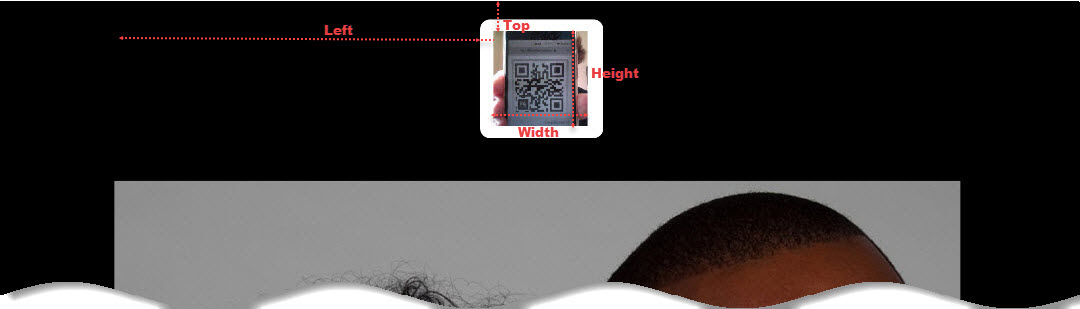
Position the web cam live view anywhere on the DSLR Remote Pro screen (Breeze DSLR Remote Pro 3.15.1)
Portrait and landscape oriented prints
Don’t confuse image orientation with print orientation. You can print on landscape or portrait oriented media. Use the large Printer Setup button to choose the print orientation as well as the print size.
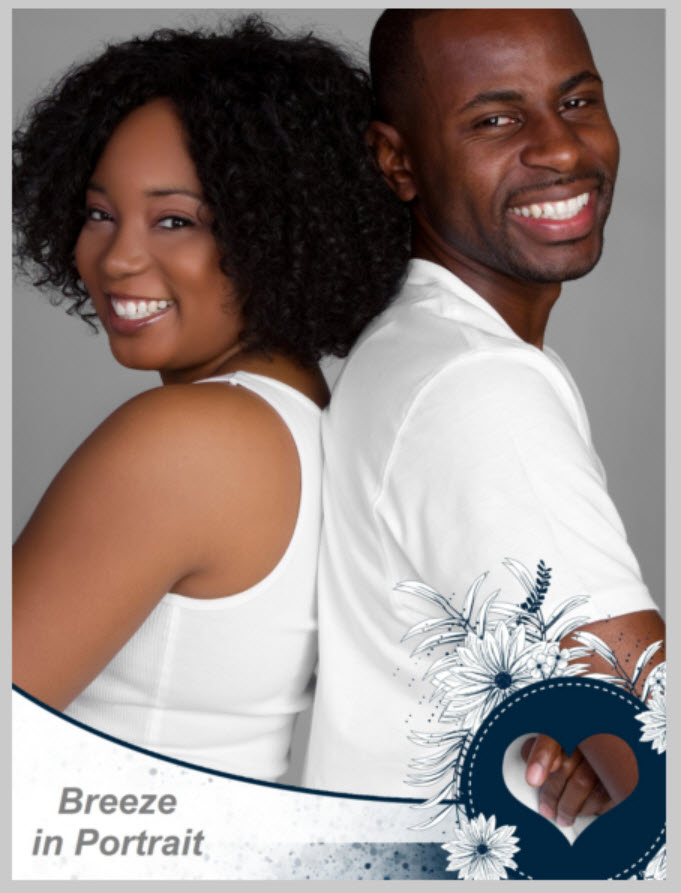
Portrait photo on portrait print (Overlay courtesy of SMOVE)
Note: DNP printers swap portrait and landcape when you print 4×6 inch (100 x 150 mm) prints
Once you have setup your printer, open the Print Layout Editor to rotate the image(s) and make any other changes to the print.
Print Layout Editor
If you are new to DSLR Remote Pro, check out the video introduction to the Print Layout Editor.
Rotating image(s) in the Print Layout Editor
You may need to rotate the image(s) through 90° to display them correctly. More details
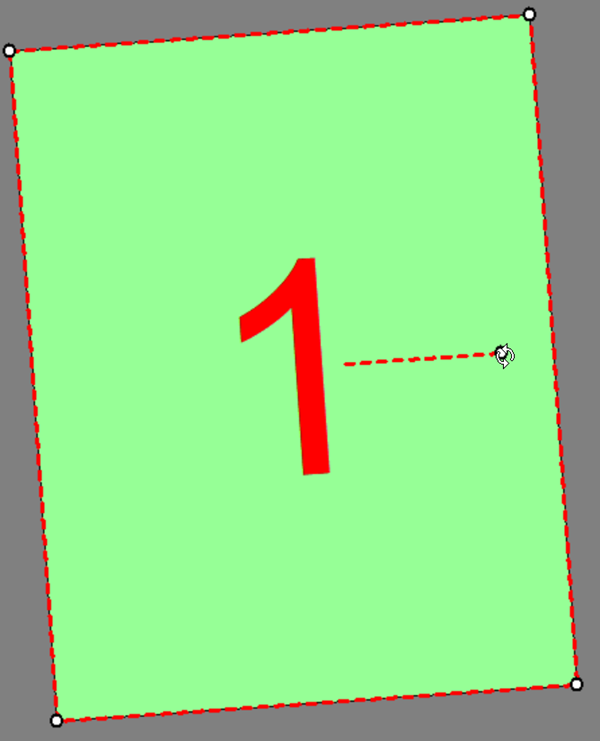
Use the mouse to rotate images in the Print Layout Editor. Hold the Shift key down while using the mouse to rotate in 15° steps (Breeze DSLR Remote Pro 3.15.1)
Add overlay, captions and logos to the print layout as usual.
When running AI background removal, use Import background… to add the new background to the print.
Reprints & the reprint selection screen
Guests often ask for an extra print after their session has finished. DSLR Remote Pro includes options to display a reprint selection screen and/or to reprint the last set of photos. When your screen is in portrait orientation, you may want the buttons at the top of this screen.
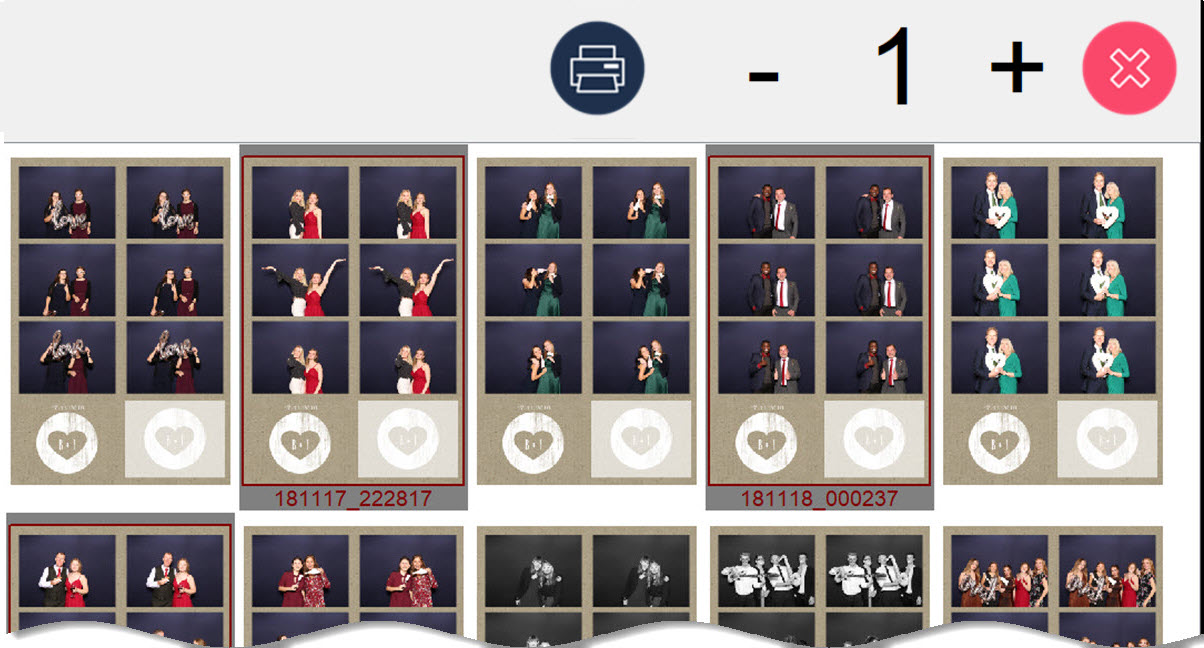
Reprint selection screen with buttons at top of screen (Breeze DSLR Remote Pro 3.15.1)
Choose Icon Placement: Top in the Reprint Selection Screen Settings window :
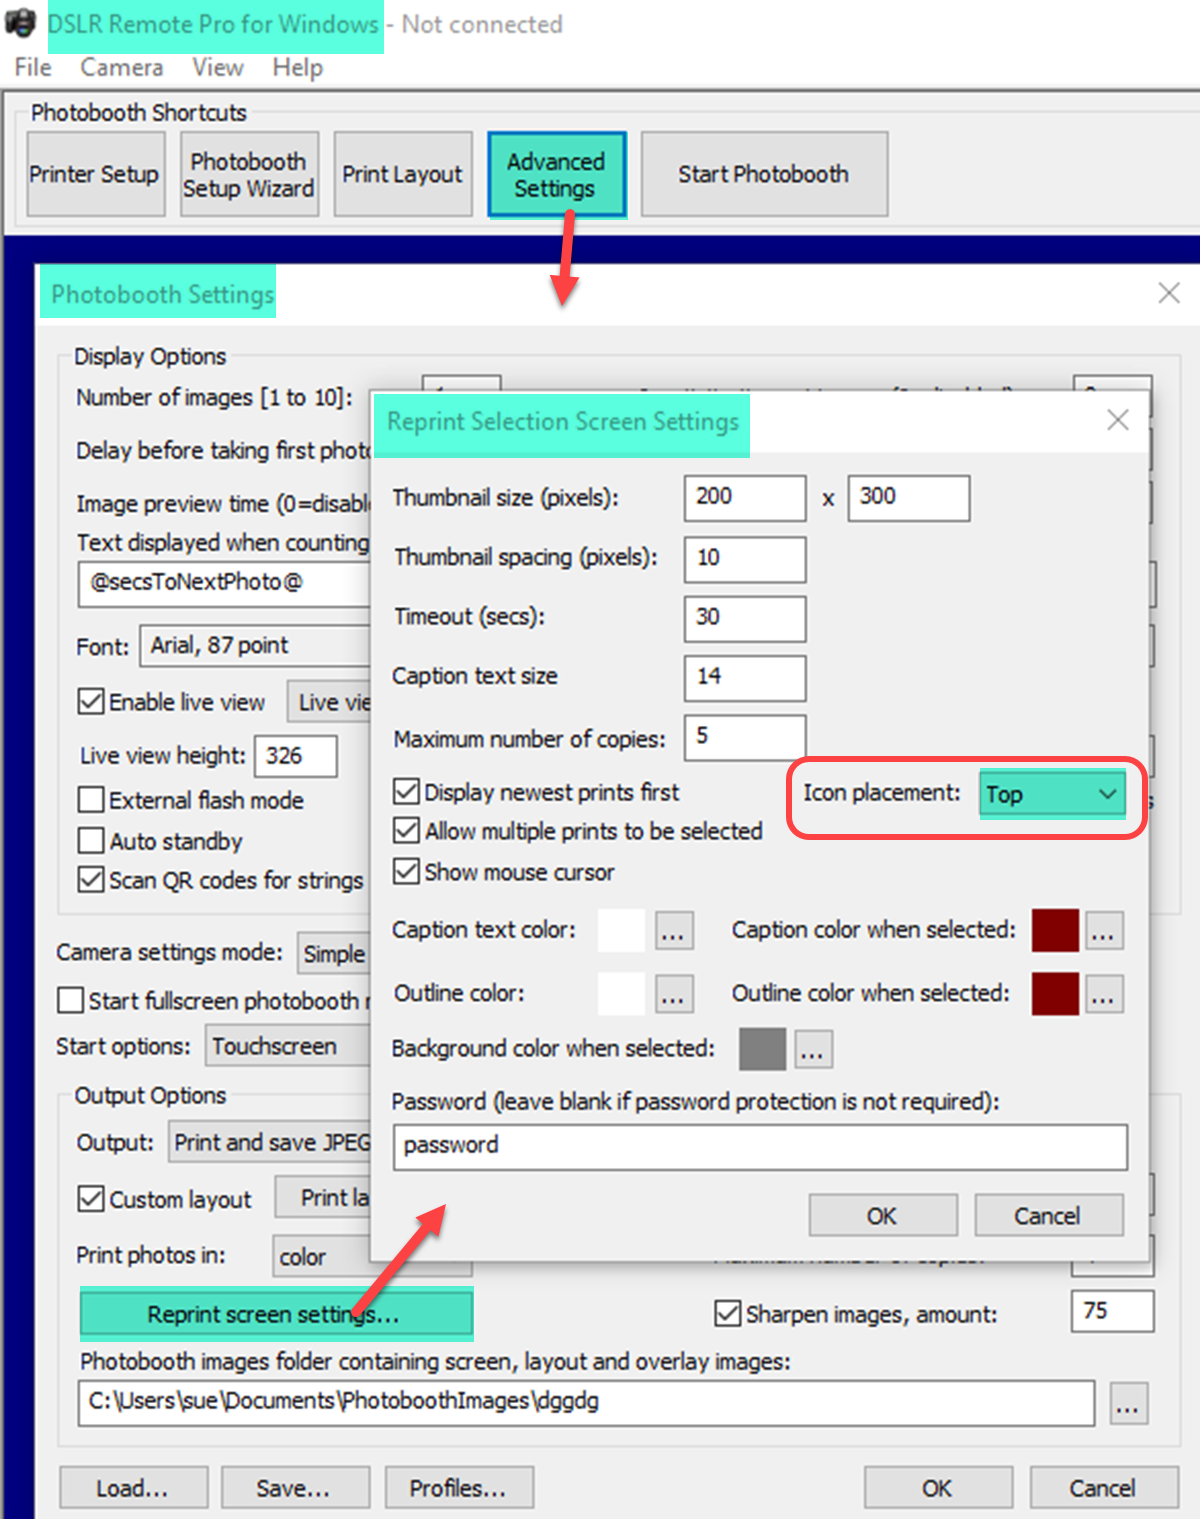
Reprint Selection Screen Settings window (Breeze DSLR Remote Pro 3.15.1)
Add hidden (or clear) actions for to access the reprint selection screen and/or reprint buttons from the Ready screen.
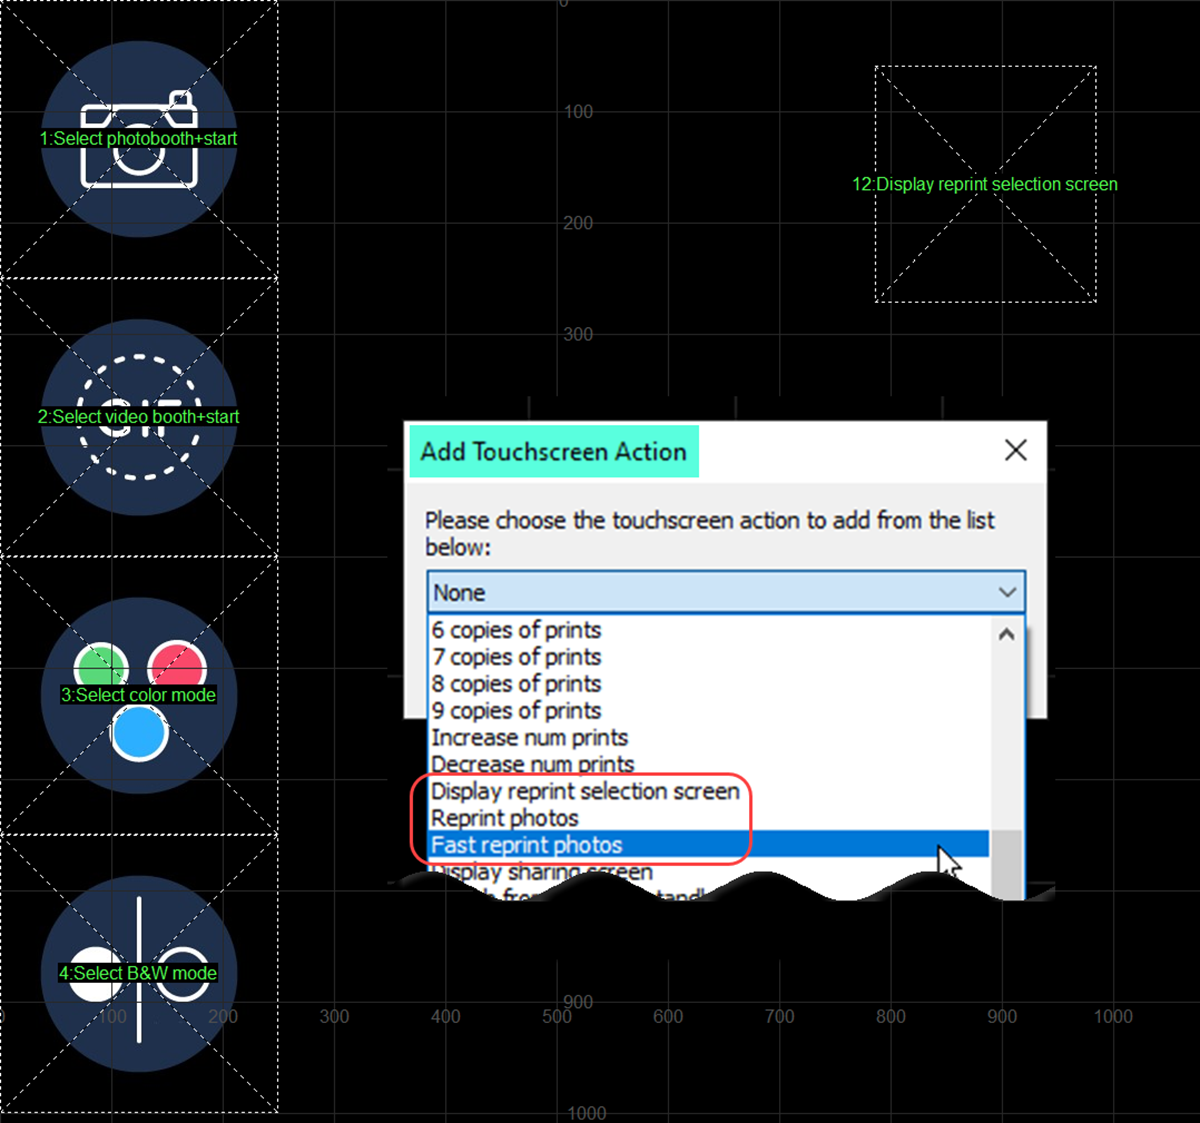
Adding touchscreen actions for a Reprint selection screen or reprint to the Ready screen (Breeze DSLR Remote Pro 3.15.1)
See the section Adding a hidden action here for more detail.
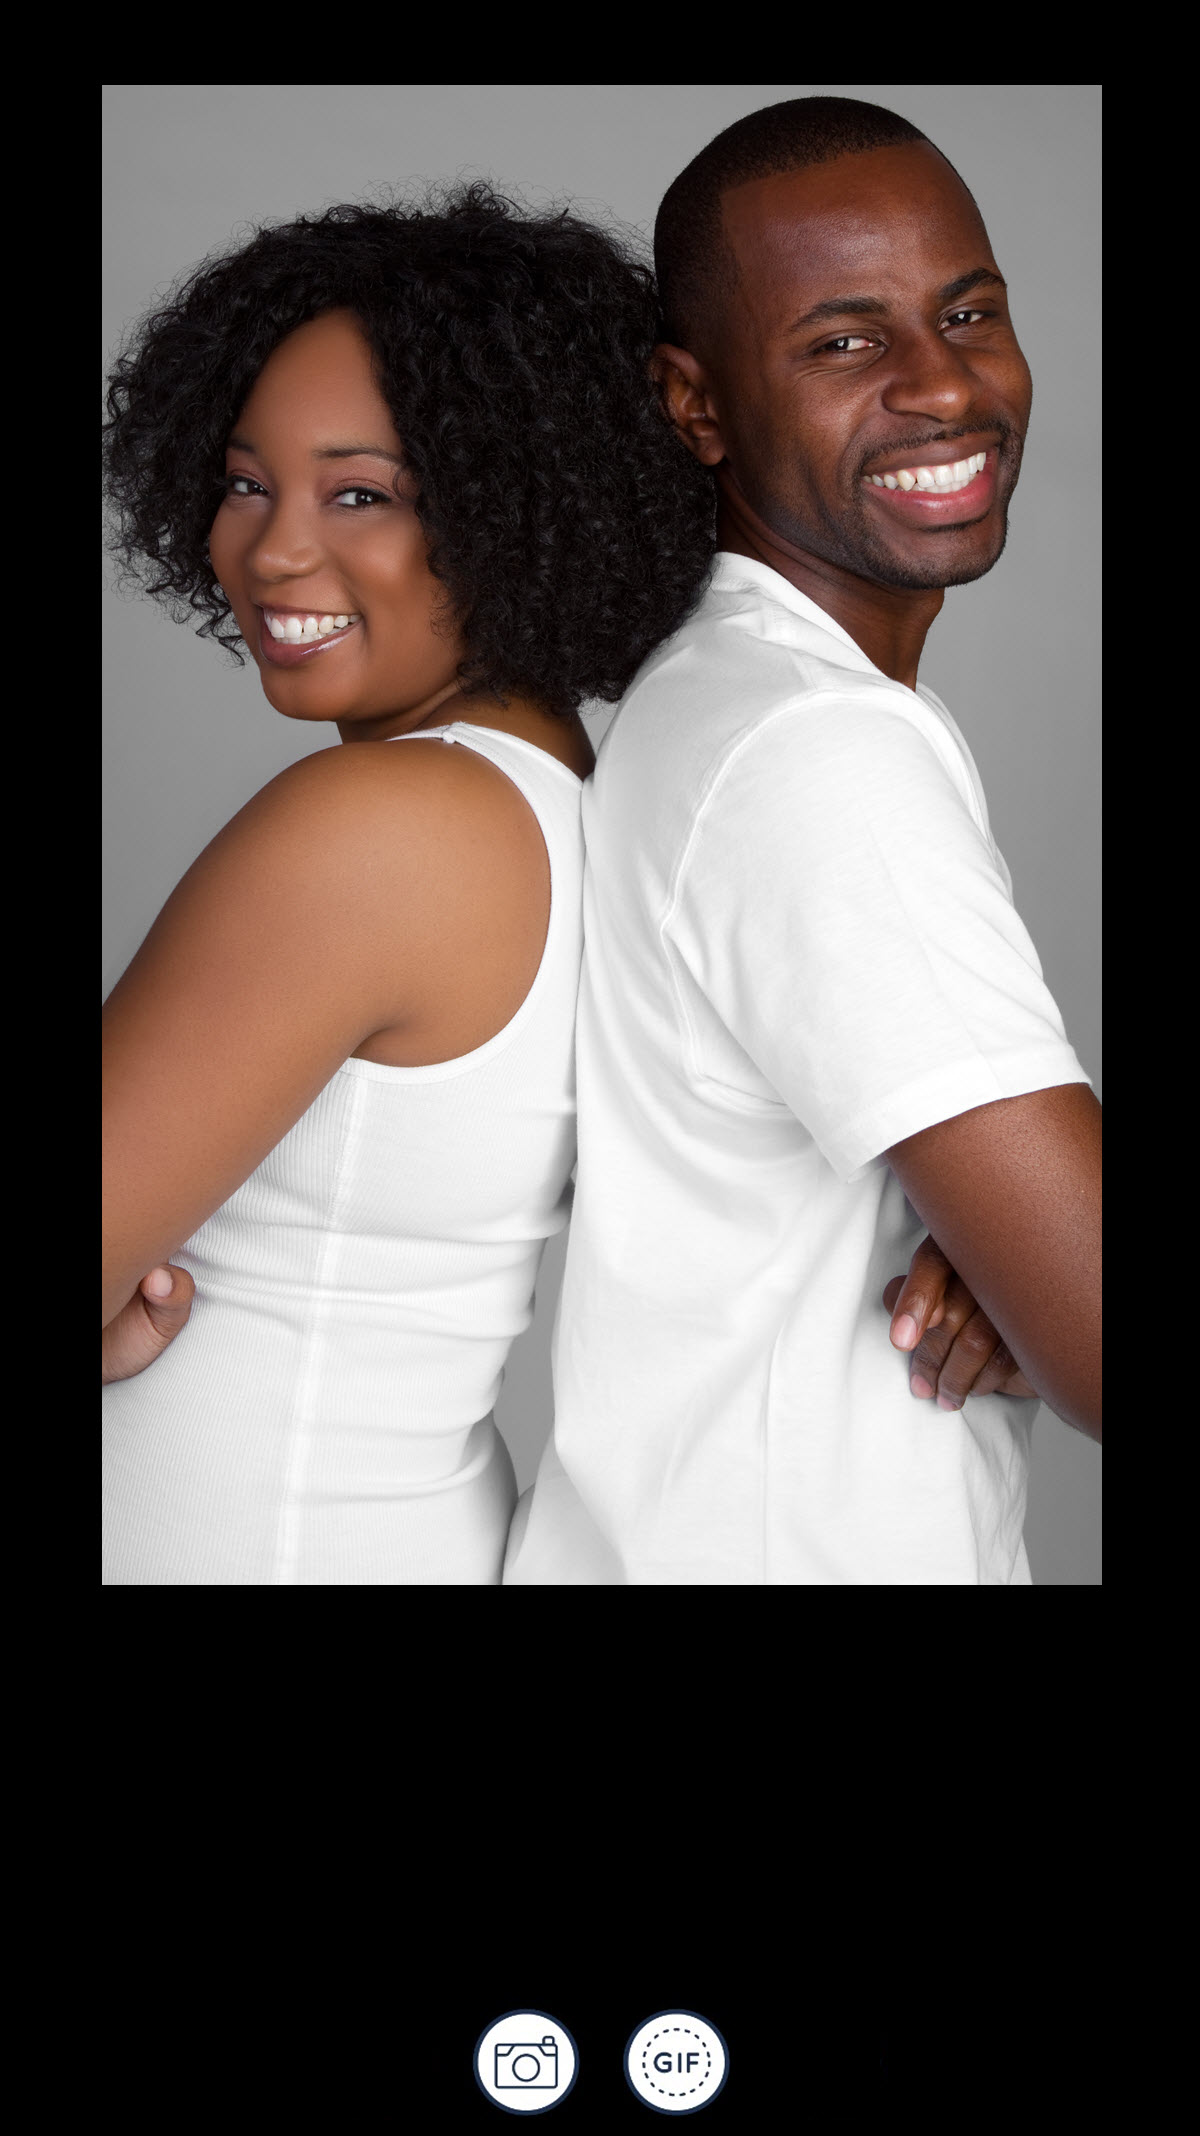
Boomerang/Burst GIFs
When shooting boomerang GIFs, the GIF width and height must be at least as wide and high as the image.
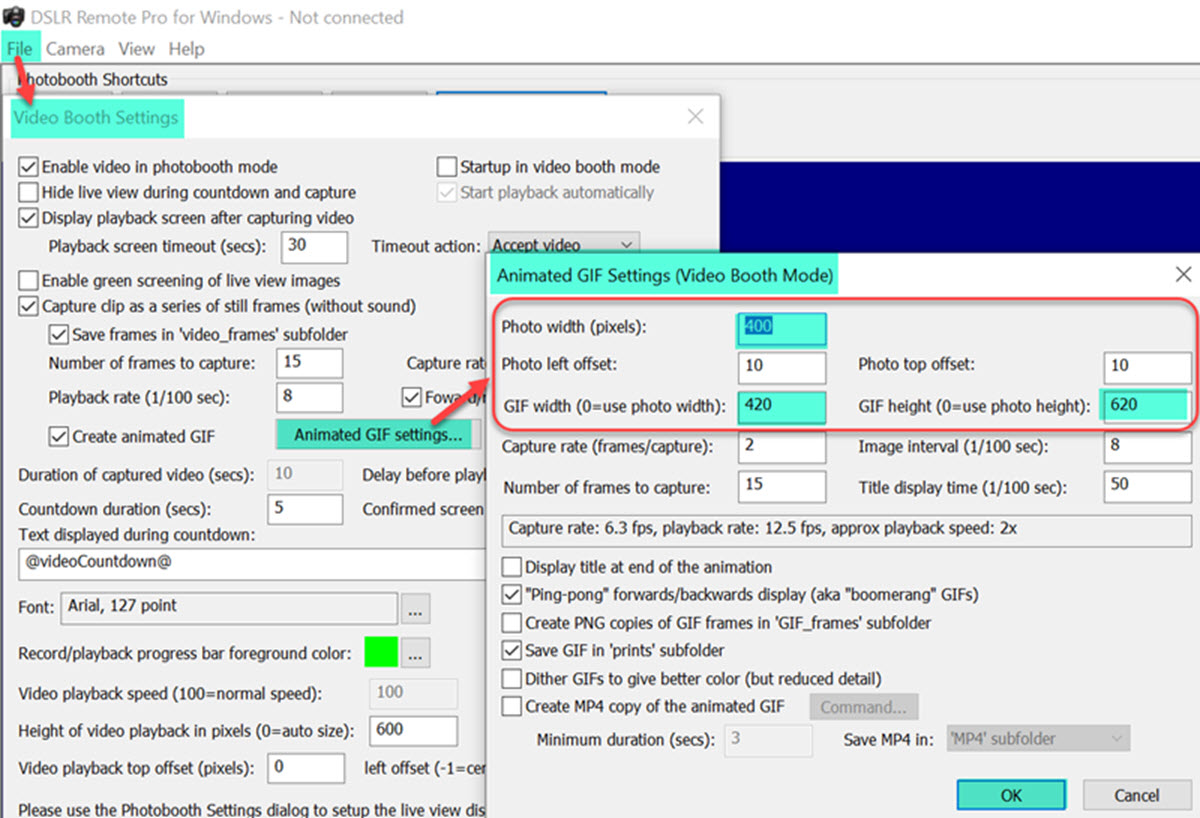
Select File, Videobooth settings.. , then Advanced GIF settings to adjust the GIF frame for portrait GIFs.
Magic Mirrors
Magic mirrors usually shoot in portrait. Essentially a magic mirror booth is a normal photo booth with the screen images displayed on the mirror and the camera hidden behind a half-silvered portion of the mirror. Breeze DSLR Remote Pro is a popular choice for powering mirror booths worldwide.
When running DSLR Remote Pro as a mirror, consider
At Step 2 of the Setup Wizard
- use a black Screen background color and contasting Text color
- uncheck the boxes to Preview each photo after it is taken & Display print preview* before printing to keep the sense of magic
- keep Display print preview checked if you want to offer virtual graffiti or adding frames to prints
- replacing captions with animations. How to remove and change captions
Remove the live view
- Guests see themselves posing in the mirror; so go to Advanced Settings and uncheck the option Enable live view
Audio and animations
You can add audio and animations to almost all DSLR Remote Pro screens.
- Tutorial showing how to animate the welcome/idle screen
- Other screens are animated in a similar way. More details
- Breeze don’t provide sets of mirror animations. You can design your own or buy them in from several suppliers. You can find suggestions for animation suppliers here
Summary
This tutorial has explained how to run DSLR Remote Pro with portrait oriented images. screens and prints. There is specific advice on running a touch free or mirror booth in portrait, plus tips on customizing the reprint selection screen.
©Breeze Systems June 2020