Update June 2020: This post is out of date. Please see Getting started with Breeze Booth for iPad
This post explains how to create and edit your own events for Breeze Booth for iPad using the Breeze Booth Event Editor 1.1 on a Windows PC, and covers
- what’s new in this release
- first steps : how to download, install and run the Event Editor on your PC
- loading events into the event editor
- cloning an event as a start point for a custom design
- portrait and landscape events
- editing an event
- transferring events to your iPad(s)
Breeze Booth Event Editor v1.1 works with Breeze Booth for iPad beta build 25, and was released on February 16th, 2019
Introduction
The Breeze Booth Event Editor is a powerful Windows based program which can be used to create and edit events for Breeze Booth for iPad.
Do join the beta program and explore Breeze Booth for iPad before using the editor. Play with ‘Designer‘ (the first event) to get a feel for what you can achieve with Breeze Booth for iPad.
New in this release…
Easier editing – you will find it much simpler to load events into the Editor, copy them and save your work.
- Simpler cloning of events
- Ability to import events from elsewhere
- Improved event format
- Simpler manifest regeneration
Chris has also added the ability to set up both initial and default profiles for an event, & load profiles from menu 1 or menu 2
Download and install Breeze Booth Event Editor & sample events
Event Editor runs on a Windows 10, 8 or 7 computer. Download it from here.
You will also automatically download Breeze Hub and the designs for nine sample events. When you install the event editor, these events will automatically be saved in your Documents folder C:\Users\…\Documents\Breeze Booth for iPad\events
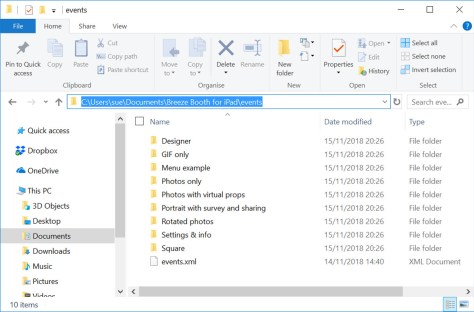
There is a sub-folder for each sample event, and a file called events.xml which you need to open in the Event Editor:
Run Breeze Booth Event Editor
Start the Event Editor, and select Open.

Load the list of existing events by selecting events.xml in C:\Users\…\Documents\Breeze Booth for iPad\events
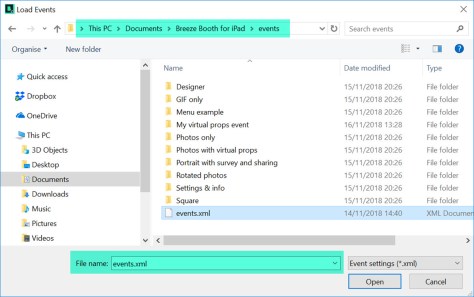
Initial list of sample events displayed in BBEE

The first event is called Designer and showcases many of the features included with Breeze Booth for iPad. You are welcome to use this design (or parts of it) with Breeze Booth for iPad at your own events.
The remaining 8 events are much simpler. They are intended to help you create your own designs.
This post will show you how to copy one of these simple events (Photos with virtual props) and edit it for your own use.
Photos with virtual props takes one photo and shares it on a custom background. Guests choose between 3 virtual props. They can also choose whether to shoot in color, B&W, sepia, comic effect or using a filter. The photo can be shared by email .
Cloning ‘Photos with virtual props’
Right click on Photos with virtual props and select Clone Event…

You can change the name, description and folder name of the new event:
Editing an event
Portrait, landscape or both?
Breeze Booth for iPad lets guests switch between portrait and landscape orientation on the fly (great for roaming booths like the Ring Roamer). My virtual props event can be used in both portrait and landscape orientation, so has designs for both.
If you will always run an event in the same orientation, you don’t need to create both designs.
Open My virtual props
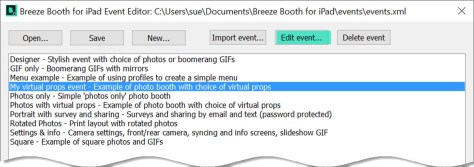
We will just edit the portrait version of My virtual props event today. Click on the portrait Edit button:

This brings us to the Photo Booth Settings screen, where you can start to customize your design

The original Photos with virtual props takes one photo and shares it on a colored background with a custom logo. Guests choose between 3 virtual props. They can also choose whether to shoot in color, B&W, sepia, comic effect or using a filter. The photo can be shared by email .
We are going to change My virtual props event to
- take 2 square photos
- remove the branded background print layout
- add a new background color, 2 logos* and a caption to the print layout
- create a slideshow GIF from the 2 photos
- customize the wording of the email
- share the slideshow GIF instead of the print layout
*You can add up to 5 different png or jpg logos to each print layout in addition to the background and overlay. This is a simple way of branding a design for a particular event, and can also be used as a quick way to add an image of the bride and groom (taken earlier in the day) to wedding photo booths.
Photo Booth Settings Screen
The Photo Booth Settings Screen is displayed for the profile you selected. It has 5 tabs : General, Photos, Slideshow GIFs, Burst GIFs, and Share. You can access powerful editors to design your screens, prints and GIFs from these settings.
Photo Booth Settings – General tab
11) Change the aspect ratio of the photos to square

You can find a full list of Breeze Booth for iPad screens here
Photo Booth Settings – Photos tab
12) Change the number of photos to 2
13) Change the countdown text color to black
14) Open the Print Layout Editor

Print Layout Editor
Use the Print layout editor to customize your prints. In the slideshow below I will:
15) Remove the branded background
16) Add a new background color to the print
17) Change the printed photo to a square
18) Right click on the background to add the second photo
19) Resize and reposition the two photos
20) Add the two logos
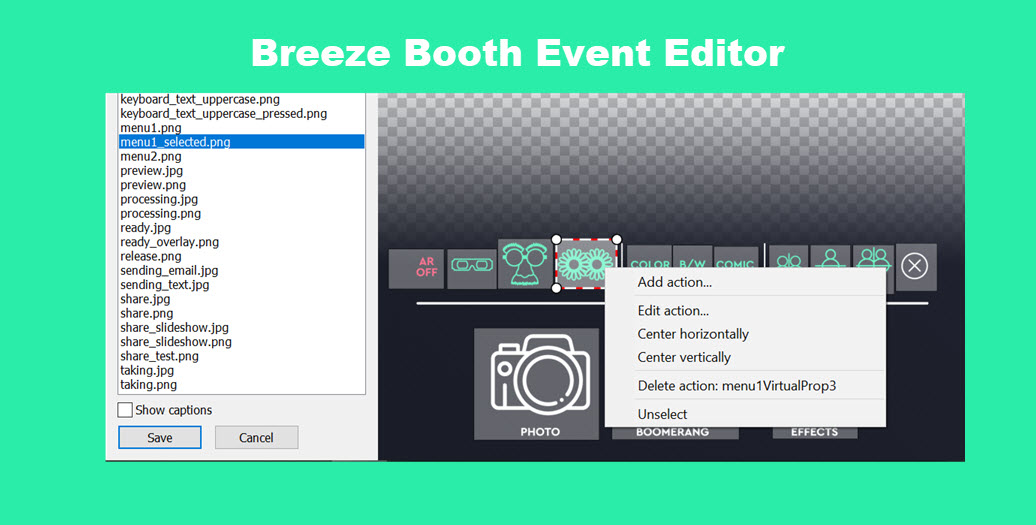
21) Right click on the background to add a caption, then right click again to edit it
22) Save my changes
Note: You can add up to 5 different JPG or PNG logos to a print
Photo Booth Settings – Slideshow GIFs tab
Check Create animated GIF,... to create an animated GIF from the two photos

Photo Booth Settings – Share tab
23) Check Share slideshow first to share the GIF instead of a print layout
24) Open the slideshow email editor to customize the message

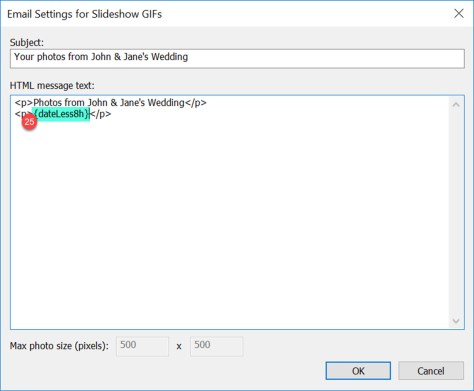
Change the subject and email text. You can use Breeze tokens (25) in emails
Before you leave the event editor….
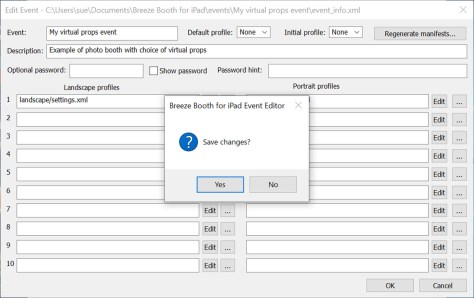
When you have finished editing the event, check OK to save all your changes.
Add an extra countdown GIF and sharing screen to the asset folder
The new event includes has two photos instead of one so we need a second countdown GIF 2.gif . We also need a screen called share_slideshow.jpg to share the new slideshow GIF.
I have copied the existing 1.gif and share.jpg screens to 2.gif and share_slideshow.jpg in C:\Users\sue\Documents\Breeze Booth for iPad\events\My virtual props event\portrait

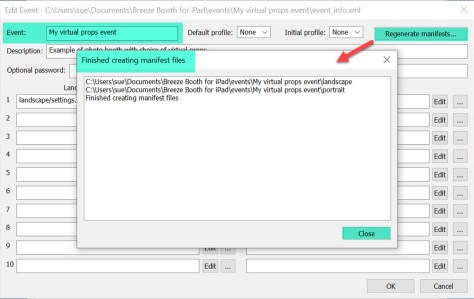
When you make any changes to this folder you must also go back to the Breeze Booth Event Editor, open the event and regenerate the manifests
Closing the Event Editor
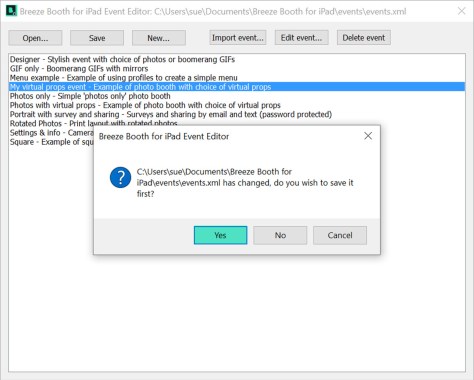
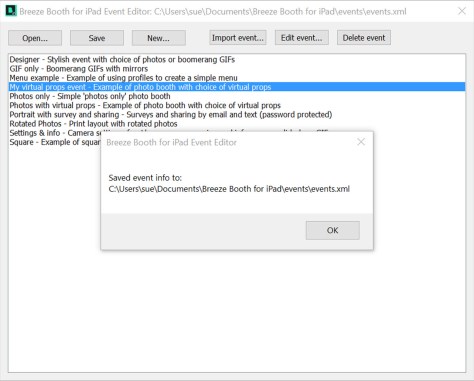
If you make any changes to your events, the Event Editor will prompt you to save changes to your events.xml folder. It is important that you select Yes to save the changes you have made and update the manifest.
Copying events from a PC to your iPads
There are currently 3 ways to copy events from your PC to an iPad:
Method 1: Sync via Dropbox
This is covered in a separate post Syncing events with Dropbox
Method 2: Sync via a secure https web server
Upload the events folder to a folder on a web server, then go the to the settings screen in Breeze Booth for Ipad and edit the URL for the sync server to point to this folder. Then use the events screen in Breeze Booth for iPad to sync the events.
Important: This method can only be used with secure servers that have https e.g. https://breezesys.com. It will not work with http URLs.
Sample events are available by setting the sync server to https://bb4ipad.com/sync in the iPad’s app settings.
Method 3: Copy the files via iCloud
Copy the event folder to a folder on iCloud that is visible on the iPad. Then use the Files app to copy the files to Breeze Booth for iPad’s assets folder.
Printing your photos
You can print using AirPrint or Breeze Hub
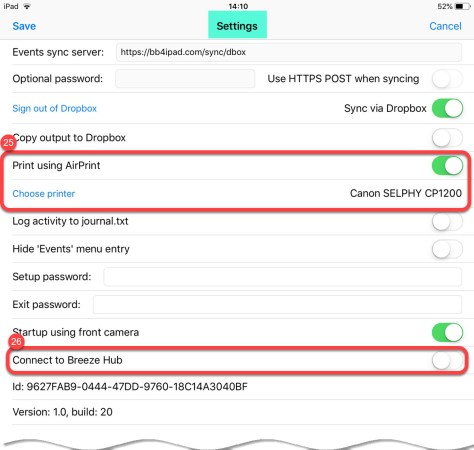
25) To print directly from the iPad connect up your printer ( which must support AirPrint) and choose Print using Airprint on the Breeze Booth for iPad Settings screen
26) To print using a Windows PC you need Breeze Hub. Choose Connect to Breeze Hub on the Breeze Booth or iPad Settings screen
Summary
This post has taken you through downloading and installing both the Breeze Booth Event Editor and a set of sample events onto a Windows PC. I have also shown how to create your own event based on one of the samples provided by Breeze, and outlined ways to transfer new and updated events to your iPads. Finally there are short notes about printing using Airprint and a Windows PC.
If you found this post useful please share it with others.
Thanks,
Sue
© Breeze Systems 2019
You must be logged in to post a comment.