Shooting Square photos with Breeze Photo Booth software

Usually photo booth images are shot in ‘landscape’ mode; so that you can comfortably include several people in the shot. Sometimes we want to vary this.

Update: DSLR Remote Pro 3.9 introduced a  simpler way to shoot square images

This post explains how to create and print square  photos using DSLR Remote Pro 3.7.3. Webcam Photobooth, NKRemote and PSRemote work in a very similar way. First we need to change the shape of the live view image; then change the print layout to match.

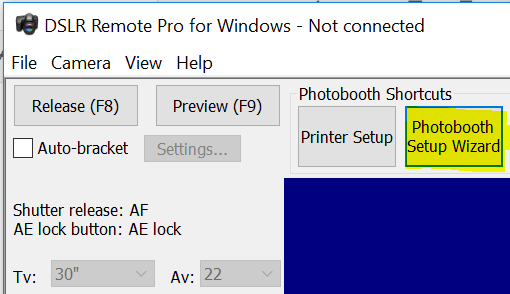
1. Start DSLR Remote Pro and run the Photobooth Setup Wizard to set up a basic booth, selecting a single photo at Step 1.

DSLR Remote Pro 3.7.3 main screen: Photobooth Setup Wizard button highlighted

2. Start the photo booth. DSLR Remote Pro allows you to customize your booth setup without connecting the camera. (NKRemote  and PSRemote users  connect and switch on the camera. Webcam Photobooth uses the PC’s internal camera if you have not connected an external camera.)

DSLR Remote Pro 3.7.3 main screen: Start Photobooth button highlighted

3. Crop the live view guests see by holding down the ‘shift’ key and pressing the cursor right arrow -> until the live view window is square. The amount of cropping is shown in the lower right corner of the screen. If you overshoot press ‘shift’ and the left arrow <- to reduce the cropping.

DSLR Remote Pro 3.7.3 : changing shape of Live View

4. Check the crop size to see whether the live view window is square: numbers in brackets show (width x height) of the live view.

DSLR Remote Pro 3.7.3 : 160 pixels have been cropped from each side of live view image to a create 640×640 square

5. Press <Escape> to exit Photobooth mode and select the large ‘Print Layout’ button to open the Print Layout Editor.

DSLR Remote Pro 3.7.3 main screen: Print Layout button highlighted

6. Right click on the photo in the print layout and select ‘Edit image position’. Set the image width and height to the same value to make the photo square.

DSLR Remote Pro 3.7.3 Print Layout editor: image on print cropped to square shape

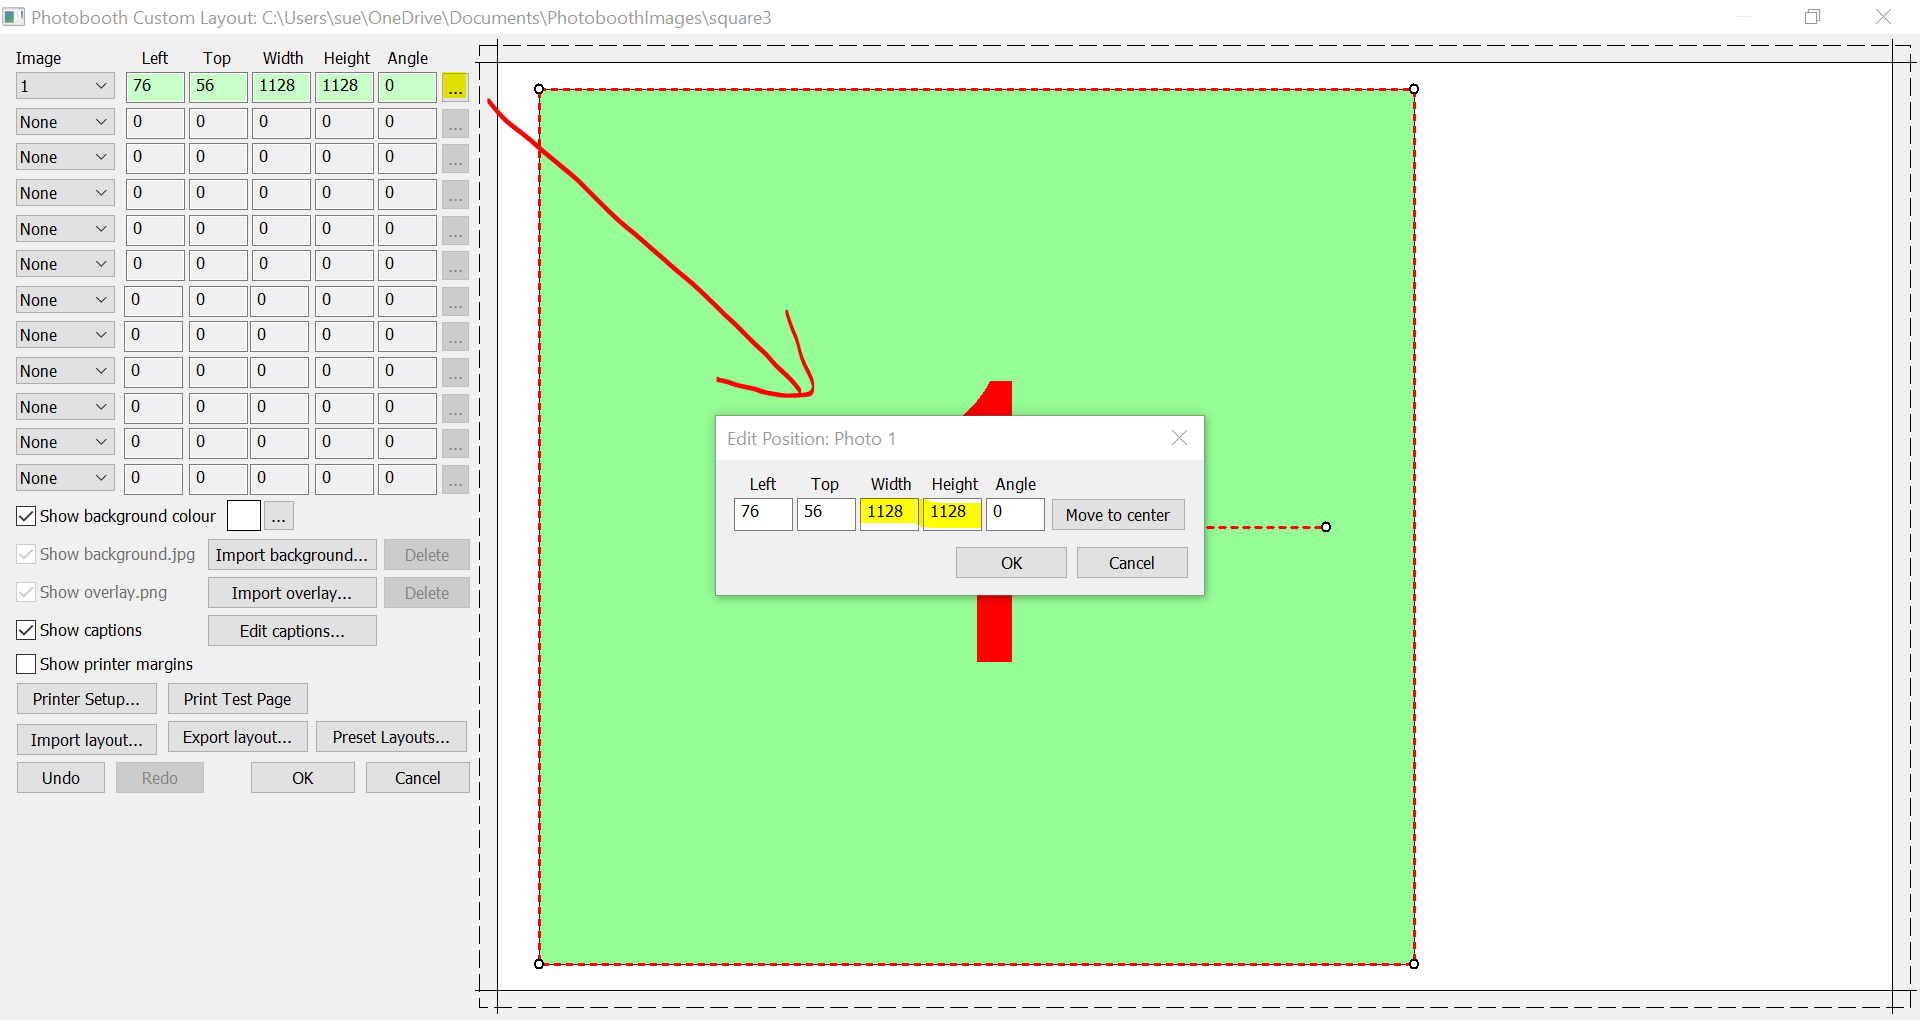
7. Click OK, drag the photo to the required position and/or resize it by dragging the corners. Add any captions, background etc before exporting the layout to save your work.

DSLR Remote Pro 3.7.3 Print Layout editor: Export layout button highlighted

Square photos can be combined with filters to give a pop art effect, or used singly for a ‘polaroid’ look.

This method can be used to create rectangular photos of any proportions you choose. More details.

Ready for more? You can also create round (or any other shape) photos using  a live view overlay and print overlay. You will need to create these overlays in an image editor such as Photoshop. The DSLR Remote Pro help files explain how to customize screens and prints in more detail.

Copyright Breeze Systems 2017

Light painting without a tent

When we first showed light painting in a bright exhibition hall at Photo Booth Expo 2016, the industry was amazed. This post explains how to use light painting at indoor venues with an open or closed booth using DSLR Remote Pro.

You can use the same technique with DSLR Remote Pro Multi-Camera .

DSLR Remote Pro Multi Camera animated GIF (5 cameras). Flash with 3 second exposure.

What equipment do I need?

  • Camera
  • Photo booth software that lets you control the camera settings
  • Flash
  • Black backdrop
  • Lighting props

Camera: we recommend using a Canon DSLR camera. Webcams and iPads are not suitable because you need complete control over the exposure and settings (including aperture). This is not possible with a webcam or an IPad.

Photobooth software: The examples here use DSLR Remote Pro and DSLR Remote Pro Multi-Camera. You can use the same technique with other programs which allow you to control the camera settings.

DSLR Remote Pro with open photobooth at Photo Booth Expo 2017

Flash: You need a powerful flash to freeze the subject at the start of the exposure. We like to position the flash high up so that people are less likely to look directly at it and be dazzled by the light. The flash also acts as a cue to the guests to start light painting. Ask them to pose until the flash fires and then start moving the lights.

Black backdrop: the light trails show up best against a black background. If you have a light background you may get ghosting (dark shadows) when guests move around.

Lighting props: guests’ phones, colored torches, LED batons or more elaborate props such as pixel sticks.

How do I use DSLR Remote Pro to control the camera to create the light trails?

  • Use external flash mode
  • Set a slow shutter speed
  • Use a small aperture and low ISO to cut out ambient lighting

External flash mode: Run the photo booth setup wizard; select <Advanced Settings> and check the box to set external flash mode. If you also check ‘Mirror output images’ the words guests write with the lights will be reversed to read correctly:

DSLR Remote Pro 3.7.3 Photobooth Settings screen: check boxes for External flash mode and Mirror Output Images highlighted

Shutter speed: You need an exposure of at least 1 second to create the light trails. We find between 2 and 3 seconds is best. (Guests start to run out of ideas with exposures longer than 3 seconds).

In the <Advanced Settings> screen select camera settings mode Bank 1, then click on the <Camera Settings> button to the right. This takes you to the camera settings screen. You need to adjust the Bank 1 settings for both taking photos and live view.

DSLR Remote Pro 3.7.3 Photobooth Settings screen: select Bank 1 and click on <Camera Settings>

Camera settings: Start with  exposure (Tv) set to 2″ (2 seconds), aperture (Av) 22, ISO 100 and white balance ‘flash’.

DSLR Remote Pro 3.7.3 Camera Settings screen: Bank 1 ‘taking photos’ settings highlighted

Live view: Select Tv: bulb for a bright live view image and White balance: Auto (ambience) for reliable colors.

DSLR Remote Pro 3.7.3 Camera Settings screen: Bank 1 live view settings highlighted

In a brightly lit venue you may need to reduce the length of the exposure or use a screen to dim the ambient light.

DSLR Remote Pro Multi-Camera users should use the same technique.

Ideas for lighting props

Colored torches (DSLR Remote Pro with open photobooth)

The simplest props are guest’s own mobile phones and colored LED torches. A set of LED finger torches can be glued together.

LED baton (DSLR Remote Pro with open photobooth)

Our most popular props are made from LED lighting strips wound round a foam baton and powered by rechargeable batteries. Pixel sticks can be customized for branded events.

For more ideas search for specialist websites and articles such as these

Breeze Systems is not responsible for the content of external web sites

© Breeze Systems Ltd 2018

Boomerang basics – animated GIFs with one extra click

Do you want to offer your guests something new with very little effort? You can add animated GIFs to your booth with just one extra click using the  Photo Booth Setup Wizard in DSLR Remote Pro.

DSLR Remote Pro and Webcam Photobooth include two kinds of animated GIFs: boomerang and slideshow. Boomerang GIFs are captured with a short video clip, and usually shared using social media or by email. Slideshow GIFs contain still photos taken during normal photobooth operation. These GIFs can also be shared. The same photos can be printed in a strip or other layouts.

This blog post explains how to create  simple boomerang GIFs using the Photo Booth Setup Wizard in DSLR Remote Pro. Webcam Photobooth works in a very similar way. You can customize your GIFs using the advanced settings.

You need DSLR Remote Pro 3.7, Webcam Photobooth 2.4 or a more recent release; a touchscreen, and your camera must support video. Customers with DSLR Remote Pro licenses issued before 22 February, 2016 also need to buy a DSLR Remote Pro upgrade license. Customers with Webcam Photobooth licenses issued before 17th May 2016 need to buy a Webcam Photobooth upgrade license.

1. Start DSLR Remote Pro. Select the Photobooth Setup Wizard.

DSLR Remote Pro 3.8 main screen showing Photobooth Setup Wizard button


2. At Step 3: Select the sharing and other options you need (B), then check the box to capture animated GIFs (C) . Choose any other options you need before clicking on <Finish> (D).


3. The next screen confirms that you have completed running the Setup Wizard. Close this to return to the main screen.

4. Connect your camera and switch it on before selecting ‘Start Photobooth’. That’s it!

DSLR Remote Pro 3.8 main screen showing Start Photobooth button


5. This is the default photo booth screen created by the Photo Booth Setup Wizard in DSLR Remote Pro 3.7.3 . Guests  switch between boomerang GIFs and still photos using the button in the top right corner.

6. You can choose whether guests share GIFs directly from the booth as shown here, or take time to browse and share them away from the booth with Breeze Kiosk (purchased separately).

7. The dinosaur chase at the top of this page shows what you can achieve just using the photobooth setup wizard.

You can modify the default settings to change the video length and playback speed;  add overlays and a title page to brand GIFs for each event. This example shows the same GIF overlaid with a simple border. The capture rate and image interval have also been altered to give a smoother result. Find out how to customize your own Boomerang GIFs .

7 December 2018: This post has been updated to show the new Photobooth Setup Screens in in DSLR Remote Pro 3.8

Copyright Breeze Systems Ltd 2017