Breeze Booth (DSLR+Windows) aka DSLR Remote Pro 3.19 was released today, bringing users support for two new cameras, an easy to use Survey Generator, Outline/Sticker Mode, Print Compositing and Time Limited events
Included in this release
Booth opens at… and closes at.. screens for time limited events
Outline/Scrapbook feature
Simple Survey Generator
Print Compositing
Support fornew Canon camerasEOS R8 and EOS R50.
Time limited events
Set start and end times for a photo booth session and the booth will only operate between these times.
Display custom screens before and after the event.
Password protected exit buttons can override these settings
DSLR Remote Pro adds suport for Canon’s new EOS R8 and EOS R50 cameras.
Canon EOS R8 camera (Image courtesy of Canon Europe)
Chris’s comments on the EOS R8 and EOS R50
The EOS R8 is a compact, high quality full frame camera with excellent autofocus which is capable of 180fps slow motion video. It’s less expensive and more compact than the Canon EOS R6 Mark II while offering similar autofocus and image quality.
The EOS R50 does not have a center contact on the hotshoe. To use this camera for a photo booth with external flash you need a Canon AD-E1 Multi-Function Shoe Adapter which fits into the hotshoe and provides a hotshoe with a center contact. Please note that this adds to the height of the camera: please ensure there is enough space in your photo booth housing for it to fit.
This page replaces one of our most popular blog posts and includes advice about hardware requirements for processing videos quickly. This is probably the most demanding task for a photo booth computer.
It’s important that guests cannot exit your photo booth screens, but you need a controlled way out.
When the booth has a keyboard attached just hit the Escape key from the Breeze Ready screen.
To exit using the touch screen, you need a hidden button. Ideally combine this with password protection.
Adding the secret button and password
This page explains how to add a hidden exit to both DSLR Remote Pro and Webcam Photobooth. Add the exit command to your touch screen settings.
Getting to the touchscreen settings in DSLR Remote Pro
Accessing touch screen settings (1) and adding your password (6) (DSLR Remote Pro 3.15.2)
Getting to the touchscreen settings in Webcam Photobooth
Accessing touch screen settings (1) and adding your password (6) (Webcam Photobooth)
(1) Start the program and go to the touch screen settings for your Ready screen. There will be a short pause before you see the next screen:
Adding an Exit button to the Ready screen (DSLR Remote Pro 3.15.2)
Right click anywhere on this screen to show the current screen and add new actions.
Actions make something happen when the screen is touched in a particular area. This screen already has actions to start the booth and switch between color and black & white. We are going to add a new action to exit the Ready screen.
(2) Select Add Action
(3) Choose the action Exit Full screen photobooth from the drop down list
(4) Drag and drop the action to a convenient location. Use an empty corner of your screen for hidden buttons. Guests won’t see them but you and your staff will find them easily.
(5) Right click again and choose Exit
6) Add a password in case a guest guesses the location of your button, or touches it by mistake.
Remember to save your changes as you leave each screen.
What this looks like in practice
Your Ready screen looks exactly the same, there is no clue that the button exists:
Ready screen with no sign of hidden exit (Breeze DSLR Remote Pro 3.15.2)The same screen showing the location of the hidden exit
Anyone finding the secret button the can’t exit the booth without knowing the exit password I added at (6) .
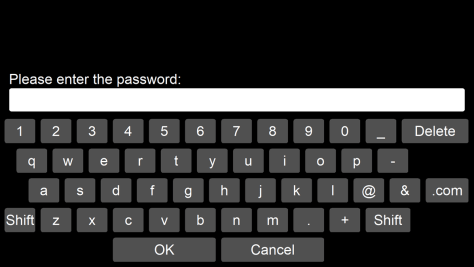
To exit the booth you also need to know the exit password (Breeze DSLR Remote Pro 3.15.2)
Adding other actions to your screens
Touch screen actions are powerful tools which give Breeze programs enormous flexibility. Use them to access the reprint selection screen, an information or T&C screen, add choices using profiles and much more.
Guests often ask for an extra print after their session has finished. DSLR Remote Pro includes options to display a reprint selection screen. Link to this screen using the Display Reprint Selection Screen action
The new tutorial explains the advantages of both, and how to set them up in Breeze Booth. Find Printing from Breeze Boothhere
You can try Breeze Booth without having or signing in to an account but it will be limited to ten photos or GIFs per day before a watermark is added to the output. Start here.
We are counting down the days to Photo Booth Expo, and looking forward to seeing many of you in Vegas. Find us in the Exhibition Hall at booth 1113; book your place at Steve Bliesner’s classes (details below).
Steve will be running four classes on Breeze at PBX this year. Classes will cover both Breeze Booth for iPad and Breeze Booth for Windows ( aka DSLR Remote Pro). There are separate classes for beginners and advanced users, with discounts for people booking several classes.
Breeze Booth for iPad, Beginners Class – Wednesday the 26th 11am
Everything you need to get a basic event up and running with the Event Editor, and then synced to the iPad app using Dropbox. The finished event will include the option to take photos, make a GIF, and apply digital props, as well as options to send them via email and SMS, direct from the iPad.
Breeze Booth for iPad, Advanced Users Class – Wednesday the 26th 12pm
For users who are already comfortable cresting events and syncing them to the iPad. This class will work through some of the more advanced features, such as white labelling the iPad App, animated screens and countdown, setting up Event Codes (for easy deployment across multiple booths), using Breeze Hub, Information screens and menus, creative uses of surveys and sending HTML emails.
Breeze Booth for Windows (aka DSLR Remote Pro) Beginners Class – Wednesday the 26th 1pm
The basics of getting up and running with Breeze Booth for Windows. A complete walk through of the using the Setup Wizard, adding print layouts, making some basic interface tweaks through to sending images and GIFs via email and SMS.
Breeze Booth for Windows (aka DSLR Remote Pro) Advanced Users Class – Wednesday the 26th 2pm
For users who already have the basics down and are looking to take advantage of some of the more advanced features. How to structure your setup for fast and efficient handling of multiple events, the best way to deploy events across multiple photo booths, profiles, advanced interface tips and tricks and how to use Breeze Hub for a better way to send emails.
Book your place
Buy your tickets here. You will need to select buy tickets in the top right corner of the page.
Breeze Booth comes with five sample events as standard, professionally designed to run on iPads. You can tweak or customize these examples to use at your own events.
Breeze Booth features the most flexible and powerful interface designer of any iPad software on the market. Use the unique drag and drop Event Editor to create totally custom experiences, complex multi menu systems and engaging data surveys.
Note:Event Editor 1.3 was released on 17th July, and can be downloaded here
Sounds fantastic! Where do I start?
Start by running the new Event Creator in Event Editor 1.2. You can create custom working designs in just three simple steps.
This post runs through
downloading and installing Event Editor 1.2
creating events from scratch with the Creator
cloning existing events
transferring events to iOS 12 devices (iPads and iPhones)
Downloading and installing Event Editor 1.2
Create and edit events using Breeze Booth’s powerful Event Editor on any Windows PC running Windows 10, 8, or 7
When you download Event Editor 1.2, you will also download the latest release of Breeze Hub and the five sample events provided with Breeze Booth. That’s great for beginners.
If you already have event designs you want to keep, we suggest unchecking the box Copy sample events to your Documents folder so that no changes are made to your events folder.
Uncheck Copy sample events … if you don’t want your existing events folder changed
Create your first event
Open the Event Editor and select Create event..
Three step Event creator creates working events for any iPad or iPhone * using the new Chameleon theme designed by Wilkes Booth Co:
This slideshow requires JavaScript.
Once the Creator has built a new event you can transfer it to your devices or use the Event Editor to make further changes.
Cloning existing events
You don’t need to build all your events from scratch. Save yourself time and effort by right clicking on an existing event to clone it:
You can also import complete Breeze Booth events created elsewhere using the Import Event… button.
Right click on any event to clone it (Breeze Booth Event Editor 1.2)
Cloning the sample events
You are welcome to use the sample events we provide with Breeze Booth at live events. To make these events your own, clone them and edit the cloned copy of the event. (You will then have an easy way to start again from the original event.)
Transferring your new event to your iPads and iPhones
Once your design is complete you need to transfer it to your iPads and iPhones.
This post scratches the surface of what you can achieve with Breeze Booth. Take a look at the Props and Filters and Surveyssample events for more ideas.
Go ahead – make it yours, make it your clients. Breeze Booth can be re-skinned to make it look like your very own photo booth software. Deploy remote and unattended iPads without fear of clients knowing what software you use. Learn more in the Breeze Booth help files
Summary
We have learned how to use the Creator to build events from scratch, and how to clone these and other events. I have linked to a separate post Syncing Events with Dropbox which demonstrates the simplest way to transfer your events to iPads or iPhones.
Is there a free trial?
You don’t need to buy a license to create events for Breeze Booth . Just download and install Breeze Booth Event Editor 1.2 onto a Windows PC. You can try out Breeze Booth and companion Apps Event Editor and Breeze Hub free of charge.
* Devices must run iOS 12. At time of writing (May 2019) Breeze Booth supports iPad Pro 11 and iPhone X series and well as iPads with 4:3 screens and iPhones with 16:9 screens
Thank you for taking the time to read this post. Please share it with others who may find it useful.
Breeze Booth comes with five sample events as standard, professionally designed to run on iPads. Run these events out of the box to get a feel for what you can achieve with the App, then tweak or customize them to use at your own events.
This post covers
a brief guide to each event
general information about the sample events
how to download and run the sample events on your iPad
Getting started
You can run Breeze Booth on any iPadOS, iOS13, iOS 14 device without having or signing in to an account but it will be limited to ten photos or GIFs per day before a watermark is added to the output. There is no charge to open the account. Use it to buy subscriptions and redeem vouchers to sign in your iPads.
You will need an account with at least one active subscription or voucher to use Breeze Booth for iPad for unlimited photos. Please see Creating an Account and Logging into the Web App for more information.
Downloading the App and sample events to your iPad
There is no charge to download and run Breeze Booth on an iPad or iPhone.
Breeze Booth runs on all iPads and iPhones running iPadOS, iOS13, or iOS 14. Once you have downloaded the App, you will be prompted to download the sample events onto your iPad. This may take a little time as two of the events are quite large. Once they are successfully downloaded, you can run any of the five events.
Each sample event includes a Welcome screen with information about the event. Tap anywhere on this screen to start the event.
Sample welcome screen for the Props & Filters demo. An overlay called ready_overlay.png is displayed over over a plain background called ready.jpg
You can replace this screen with one suited to your own events, perhaps including instructions for your operator, or support information for unattended booths.
If you don’t want to use welcome screens you can hide them.
The welcome screens include a reminder that there is a secret button in the top right hand corner of each event ready screen to access the admin menu. You can password protect the settings screen if required.
Admin menu
The sample admin menus are the same for all the sample events, and include five options
return to the admin screen
switch between front and rear cameras
adjust the camera settings
sync (download the most recent version of) the event
back – go to the previous screen
Privacy/information button
There is a privacy/information button in the top left or lower right corner of all the sample events. This takes guests to one or more screens with extra information. These screens are a great place to put your business details, terms and conditions, privacy statement, or even troubleshooting advice. The sample events all include two pages of information; you can change both the content and number of information screens.
Printing and emailing from the iPad
Breeze Booth can run as a standalone App where guests email images and/or print them using AirPrint. You can also link the booth to a Windows PC running Breeze Hub for Windows based printing.
The five sample events all print and email directly from the iPad, so you do not need a Windows PC to run them.
Booth orientation
You can run Breeze Booth in both portrait and landscape, and set it up to automatically switch between the two when the iPad is rotated. Most iPad booths run in portrait orientation, so the sample events are designed for this. We have included a simple screen prompting operators to rotate the iPad back to portrait if they try to run it in landscape.
Sample landscape ready screen directing users to rotate the iPad back to portrait orientation (Breeze Booth)
You can change the design of this screen or remove it.
Five sample events
Props and filters
Boomerang GIF
Photo (no printing)
Print Menu (Printing)
Surveys
To make the most of these demos (1) run them, (2) read these notes, and (3) look at how the event is set up in the Event Editor app.
Choosing the Smiling Fowers prop Breeze Botoh for iPad
Color Filters
Breeze Booth comes with monochrome, sepia and comic style filters as standard. You can add six more custom filters.
The color and BW filter in this demo were custom made in Lightroom. To learn more about how to create your own filters, see the online manual.
Mirror Effects
Breeze Booth includes a range of mirror effects; from a simple vertical split screen mirror, to a quad screen of vertical and horizontal. Mirror effects can be applied to still images, slideshow GIFs and burst/boomerang GIFs.
Sub Menus
Breeze Booth lets you create your own sub menus. Props and filters demo uses one menu to display the choice of special effects. A second menu is used for Admin options, giving simple access to functions including Sync, camera settings and exit to the main settings. Tap the right hand corner to check this out.
Sharing by email and text
The sample events share photos by email using the inbuilt iOS Mail App. For more control over email style and content use SMTP emails.
You can also share by text using a third party service called Twilio. The sample events do not include this option.
Info Screens
Info screens are a way of presenting information to people using the photo booth. In this demo, the Info Screen is being used to display a Privacy Statement. Unattended booths might use info screens for a guide on how to use the photo booth. Corporate events might have info screens displaying their terms and conditions.
Initial Profile
Initial Profiles are a great tool to force guests or your operator to view particular information before running the booth. The sample events use the initial profile to educate people about these demos.
Demo 2 Boomerang GIF
This demo features:
Boomerang / Burst GIF
BW color filter
Animated overlay
Color filters
Breeze Booth comes with monochrome, sepia and comic style filters as standard. You can add six more custom filters.
The color and BW filter in this demo were custom made in Lightroom. To learn more about how to create your own filters, see the online manual.
Animated Overlays
GIFs can also have animated overlays applied as a series of transparent PNG files. For more information about setting up animated overlays, see the online manual.
Demo 3 Photo
This simple demonstation takes 3 photos and makes a slideshow GIF from them.
Demo 4 Print Menu
This demo features
multiple profiles
print layouts
printing
Multiple Profiles
Profiles can be used to build a custom menu system, offerings guests choices. In this demo, the menu allows a user to choose which print layout they want.
Print Layouts
The demo shows three different layouts; 6×2 strip, a single image 6×4 and a 6×4 with 4 photos.
Printing
Photos can be printed directly from the iPad with an AirPrint printer, or use our free App Breeze Hub for Windows based printing.
Windows driven printing lets you use a huge range of printers including almost all dye sublimation printers. More about printing.
Demo 5 Surveys
To make the most of this demo, have a read of these notes, and be sure to try out all the surveys. Then check out where and how the images have been saved, and have a look at how the event is set up in the Event Editor.
Note: The sureys demo has been designed to show creative ways you can customize Breeze Booth to collect and use guest data. It is not intended for use at live events.
This demo features 5 different surveys
Opt In/Out (with multiple options)
Simple Accept/Decline
Age gate
Simple Graphical Options
Advanced Graphical Options
Also demonstrated, is how data can be affected by the choices users make. As an example, the choices users make can determine:
Where images get saved
The file names of images
What text gets added to print layouts
What text gets added to emails
Where/how the images are saved
To see how survey data can affect where and how images are saved, run the demo on your iPad and check out what has happened to the images from your session.
On the iPad, open the Files App and then tap On my iPad, then Breeze Booth, then Photos. Take special note of the folder names, specifically paying attention to the Demo 5 folders, and then take a look at the files in each, and see how the file names are effected by the survey choices.
Using Survey Data in emails
Data from the survey can be used in emails like the one sent by this event.
Using the Survey Data in prints
Have a look at the print attached to the email. See how Steve creatively used the data you entered for emotion, age and Toblerone price on the print.


You must be logged in to post a comment.