This major upgrade to Breeze Booth (Windows+DSLR) aka DLSR Remote Pro is packed full of new features and improvements.
DSLR Remote Pro 3.16 improves sharing, simplifies set up for digital booths, adds built in reporting tools for event and survey stats, and supports touch free mobile and credit card payment systems.
Guests can now choose between different print templates either at the start or close of their session.
12 January 2022: DSLR Remote Pro 3.16.1 fixes an issue adding attachments to emails as file attachments. Users who send emails from DSLR Remote Pro are recommended to upgrade to v3.16.1 instead of using v3.16.
DSLR Remote Pro 3.16.1 is a free upgrade for all customers entitled to use DSLR Remote Pro 3.16.
Retro booth – 21st century payment. Take Apple Pay, Google Pay, Sumsung Pay and cards as well as cash or bills with Breeze.
Improved sharing
No more waiting for images to upload before the next session starts – DSLR Remote Pro 3.16 sends emails & texts in the background
Share high quality MP4 copies of GIFs as standard
Full control over email attachments
Report event sharing stats to your clients
New Scan at startup option to spot and share any unsent texts and emails
Digital booths made simpler
Whether your customers love digital or you can’t get your hands on any media this holiday, digital booths are everywhere. DSLR Remote Pro 3.16 makes it easier to switch to print free events.
Set up a print free digital booth with a single click using the updated Photo booth Setup Wizard
Captions generated by the setup wizard have been updated to suit both print and digital booths ( English only)
Built in Analytics
New reporting tools analyse sharing stats, survey results and session data from DSLR Remote Pro
Sharing report shows the number of sessions, quantity of emails and texts sent, and lists each email address and cell phone number.
Event statistics summarizes data from one or many booths, identifying the busiest periods and devices. This report also shows the total number of sessions broken down by photos, GIFs and video, ad sharing figures for the event.
Survey Data details guest responses to your surveys. The report can also combine responses from other booths running DSLR Remote Pro, Breeze Booth for iPad and Webcam Photobooth.
Rapid export to Excel and other spreadsheets: Copy and paste data from all DSLR Remote Pro reports into spreadsheets for further analysis and creation of graphical reports.
Choose between backgrounds and overlays after the photos are taken
Superb with AI background removal. Guests check how they look in up to 6 different environments before printing and sharing their photos.
Improvements to the Photo booth Setup Wizard
The Breeze Photobooth Setup Wizard is a fast, simple and reliable way to generate a working booth. DSLR Remote Pro 3.16 adds
New Digital booth option
New Create Slideshow GIF option
Photos shared as animated GIFs converted to MP4s*
Higher quality images shared as standard**
*Print layouts (especially strips) often work better on paper than online. Add interest by sharing the same photos as a GIF converted to an MP4.
** You can still tweak the DSLR Remote Pro settings to find the best balance between sharing high quality images and sharing images quickly.
Total control over email attachments
DSLR Remote Pro 3.16 gives total control over the quality and images you share by email. You have complete freedom to choose whether to share photos, GIFs, print layouts &/or movies.
Support for contactless mobile and credit card payments
Our powerful new payments utility improves support for taking payments from unattended booths. Great for clubs, retail, theme parks, bars and museums.
Payment based photo booths accept Apple Pay, Google Pay, Samsung Pay and other mobile and NFC payments, debit & credit cards, notes or cash using the Breeze MDB Payment Utility.
Option to disable line drawing on prints so that users can only add emojis or stickers to prints
Option to create events with slideshow GIFs or MP4s and for “digital only” events when running the photo booth setup wizard
The processed image now supports a background image named processed_photo_background.jpg. When using the transparent background option when shooting green screen or using AI background removal the optional greenscreen_background.jpg image is added to the photo’s background before it is added to the processed image
The time the reprinting.jpg/processing.jpg screen is displayed when reprinting from the reprint selection screen is now configurable
Ability to scan in the event name and event strings when scanning QR codes.
A few fixes
Updated URL shortening for SMS+image text messages due to changes made by TinyUrl.com
Fixed issue with the live view 4:3 aspect ratio option not cropping the live view
Fixed issue with the sizing of preview images in photo booth mode with some screen sizes andorientations
Finally
Support for legacy print layout which was replaced by the print layout editor in DSLR Remote Pro v3.0 has been removed
Upgrade to DSLR Remote Pro 3.16.1 today
DSLR Remote Pro 3.16.1 fixes an issue adding attachments to emails as file attachments. Users who send emails from DSLR Remote Pro are recommended to upgrade to v3.16.1 instead of using v3.16.
DSLR Remote Pro 3.16.1 is a free upgrade for all registered users who purchased DSLR Remote Pro after 15th December 2020.. Customers with older licenses need to buy an upgrade license to use this release.
Check out the new tutorial explaining how to print from the sharing screen in Booth (DSLR + Windows) aka DSLR Remote Pro.
This is a great way to streamline the booth workflow when your guests choose whether to print and/or email their photos. The tutorial also covers limiting the number of prints, customizing the text on the sharing screen and adjusting the preview image for best effect.
Breeze Booth (DSLR + Windows) aka DSLR Remote Pro is a highly configurable, yet simple to use photo booth application, easy to configure for small operators and scalable for organisations running hundreds of photo booths across multiple cities and countries. Learn more and try for yourself.
This post explains how to set up your booth with the Photobooth Setup Wizard in DSLR Remote Pro.
Note: This post was updated in November 2018 and shows DSLR Remote Pro 3.12
We recommend everyone from beginner to expert uses the Photobooth Setup Wizard as a start point for setting up a booth. The wizard also helps generate profiles quickly. This is a simple, speedy and safe way to generate a working system.
This video shows how easy it is to prepare your system using the default settings:
Create a GIF/Photo booth in less than a minute
Now let’s run through how to customize your own booth using just the wizard.
The 3 Step Wizard in more detail
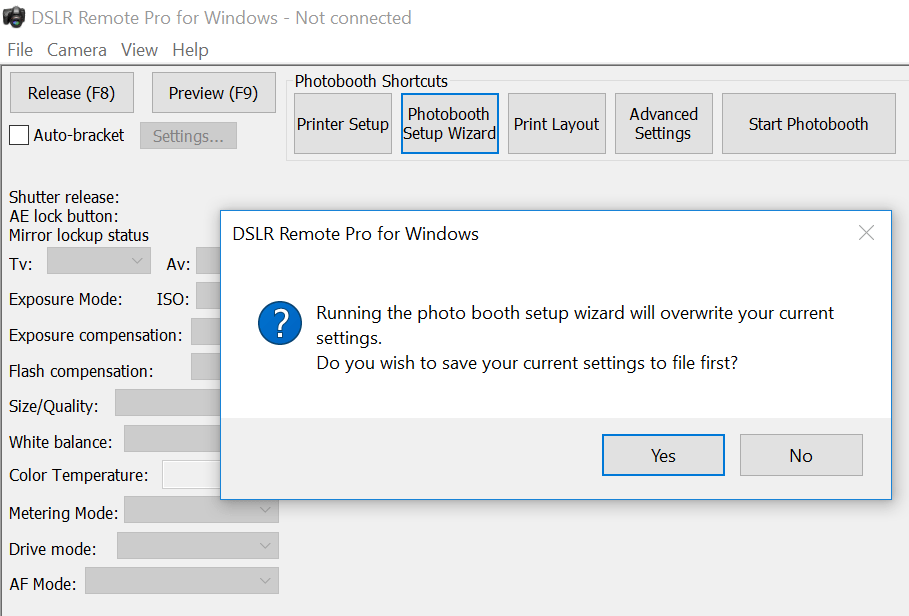
Select Photobooth Setup Wizard (1). First you will be prompted to save your current settings
Saving your current settings before running the Photobooth Setup Wizard DSLR Remote Pro 3.12
Step 1
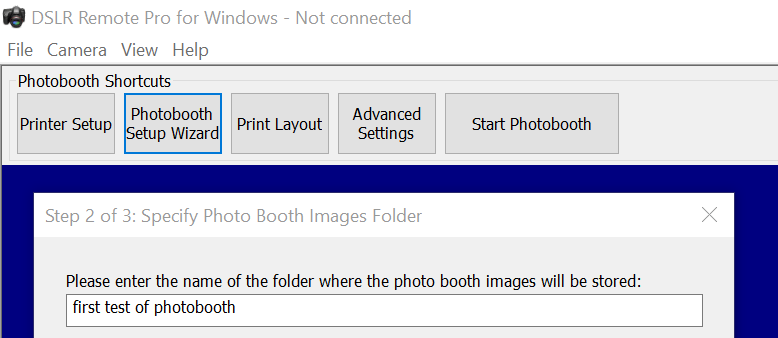
Step 1 simply asks you to name the folder (2) where your photo booth images will be stored. These ‘images’ are the set of screen designs and layout images you will use. (This is usually a subfolder for your PhotoBoothImages folder.) Press Next (3) to move on to Step 1.
Step 1 of the Photobooth Setup Wizard DSLR Remote Pro 3.12
Step 2
The second step is to define the screens used by guests to interact with the booth. Adjust the default settings to meet your needs.
Dropdown list to give guests choices (Photos/Boomerang GIF, Photos only, Boomerang GIFs only, Photo or video, Video only)
This drop down list is a super-fast way to set up the booth to offer guests choice (DSLR Remote Pro 3.12 Photobooth Setup Wizard Step 2)
Single ready screen to choose from Photos or Animated GIFs
Check this box for single ready screen (DSLR Remote Pro 3.12 Photobooth Setup Wizard Step 2)
Choose Photos or Boomerang GIFs and check Single ready screen so that guests start the booth and choose between still photos and boomerang GIFs from a single screen (as in the video above)
Dropdown list to choose a predefined theme
Selecting a predefined theme to use with DLSR Remote Pro 3.12 at Step 2 of the Photobooth Setup Wizard
You can create, load and save DSLR Remote Pro themes containing screen background, touchscreen button, and caption sets, or buy them from third parties.
Your themes may include localized sets of captions in a variety of languages. DSLR Remote Pro 3.12 is shipped with English, German, Polish, Italian and Romanian captions.
Button placement
Buttons can be placed down the side or across the bottom of the screen by the wizard. (DSLR Remote Pro 3.12 Wizard Step 2)
Dropdown list to adjust live view
Live view drop down list – choose from normal, square, full screen, 4:3 and disabled (DSLR Remote Pro 3.12 Photobooth Setup Wizard Step 2)
Changing the live view in the Wizard will automatically adjust the shape of images in both animated GIFs and prints created by DSLR Remote Pro 3.12.
Color of the background screens and text
Defining colors of the background screens and fonts (including custom colors) with the Photobooth Setup Wizard in DSLR Remote Pro 3.12
Editing individual captions
Import complete captions sets using themes as above. Change (or remove) the text for individual captions using Edit captions:
Editing individual captions in the Photobooth Setup Wizard DSLR Remote Pro 3.12
Additional checkboxes
Checkboxes in the Photobooth Setup Wizard Step 2 DSLR Remote Pro 3.12
The first 5 check boxes highlighted in green tell the Wizard whether you are using a touchscreen, whether guests can choose between color and B&W prints, whether to display a preview of each photo after it is taken and the maximum number of prints allowed.
Sharing checkboxes in the Photobooth Setup Wizard Step 2 DSLR Remote Pro 3.12
The next five check boxes tell the wizard whether a sharing screen (after the photos are taken) should offer uploads to guests Twitter* accounts, share photos by email or MMS/SMS, or offer optional printing.
Hint: some operators prefer to offer browsing and sharing from a kiosk separate to the booth. You can use Breeze Kiosk for this. To share and print photos away from the booth leave these boxes unchecked.
*Facebook No Longer Available
Please note: On 1st August 2018 Facebook withdrew the permissions required to upload photos from a desktop app in response to the Cambridge Analytica scandal. This means that it is no longer be possible to upload photos to Facebook directly from DSLR Remote Pro. Photos can be shared on Facebook by emailing or texting them to users where they will be able to share them using the Facebook app running on their own device. Alternatively upload the photos to a website or microsite and provide sharing links to allow users to share the photos on Facebook when they view the page on their device.
Inactivity timeout & use default settings
Inactivity timeout and ‘Use default setting’ button DSLR Remote Pro 3.12 wizard
The inactivity timeout is useful if the photo booth is not in continuous use because it disables the live view display and puts the booth into standby mode. Disabling live view will allow the camera’s sensor to cool down to avoid possible overheating problems. The booth can be reactivated by touching the screen. To use the inactivity timeout, just set the number of seconds after which you want to put the booth into standby.
Select Use Default Settings to restore the default settings for the photo booth.
Next takes you to the third and final step (unless you chose only GIFs or video, in which case you skip Step 3).
Step 3
At Step 3 you choose the print layout and adjust your printer settings if necessary( DSLR Remote Pro 3.12 Photobooth Setup Wizard)
The wizard offers a choice of 8 popular layouts; if you want something different choose whichever is closest to your design (you will be able to change this using the Print Layout Editor later).
Running a GIF booth with animated GIFs and no printing is increasingly popular. The DSLR Remote Pro Wizard no longer asks you to select a printer when you offer only Boomerang GIFs or Video.
Check a single box in the Photobooth Setup Wizard to shoot and print square photos using Breeze DSLR Remote Pro 3.9.
Usually photo booth images are shot in ‘landscape’ mode; so that you can comfortably include several people in the shot. Sometimes we want to vary this.
Run the Photobooth Setup Wizard
Start DSLR Remote Pro and run the Photobooth Setup Wizard (1) to set up a basic booth, selecting a square live view (2) at Step 2. DSLR Remote Pro allows you to customize your booth setup without connecting the camera.
Selecting square live view using the Photobooth setup Wizard: DSLR Remote Pro 3.9.1
In this example I have chosen a single photo (3) at Step 3.
Photoboth Setup Wizard: selecting a single photo DSLR Remote Pro 3.9.1
Customize the print layout
Opening the Print Layout Editor DSLR Remote Pro 3.9.1
When you open the Print Layout Editor you will see that the print layout is square. Customize your print as usual.
Square Photo layout in Print Layout Editor DSLR Remote Pro 3.9.1
Start the photo booth
Select Start Photobooth to run the booth DSLR Remote Pro 3.9.1
The Photobooth Setup Wizard has cropped both the live view and print layout for you.
Default ready screen for square photo DSLR Remote Pro 391.jpg
Square photos can be combined with filters to give a pop art effect, or used singly for a ‘polaroid’ look.
Ready for more? You can also create round (or any other shape) photos using a live view overlay and print overlay. You will need to create these overlays in an image editor such as Photoshop. The DSLR Remote Pro help files explain how to customize screens and prints in more detail.
PBPI delegates last month enthused about a pre-release version of the program. One even exclaimed “I’ve fallen in love with Breeze again”. I am delighted to announce the release of DSLR Remote Pro 3.9 on Valentine’s Day.
What’s new?
Improvements to the Photobooth Setup Wizard
Animated GIFs with soundtrack
Extra branding/ logo overlay for animated GIFs
Faster, higher quality green screen processing
Fix for issue with complex HTML emails
DSLR Remote Pro 3.9 supports most Canon DSLR cameras and runs on Windows 10, 8 and 7. This release is a free upgrade for all registered users who purchased a license on or after 15th February 2017. Customers with an older DSLR Remote Pro license (and any NKRemote license holder) can buy an upgrade license to use this release.
Photobooth Setup Wizard – a piece of cake with Breeze DSLR Remote Pro 3.9
Chris has improved the flow of the Wizard, making it a piece of cake to build a system offering guests choices (such as Photos or GIF), and run the booth with square or full screen live view as an alternative to normal landscape images.
New dropdown list to give guests choices (Photos/Boomerang GIF, Photos only, Boomerang GIFs only, Photo or video, Video only)
This drop down list is a super-fast way to set up the booth to offer guests choice (DSLR Remote Pro 3.9 Photobooth Setup Wizard Step 2)
New dropdown list to adjust live view
Live view drop down list – choose from normal, square and full screen (DSLR Remote Pro 3.9 Photobooth Setup Wizard Step 2)
Use the setup wizard to customize the live view. Changing the live view in the Wizard will automatically adjust the animated GIFs and prints created by DSLR Remote Pro 3.9.
New improved ready screen to choose from Photos or Animated GIFs
Check box for single ready screen (DSLR Remote Pro 3.9 Photobooth Setup Wizard Step 2)
Choose Photos or Boomerang GIFs and check Single ready screen so that guests start the booth and choose between still photos and boomerang GIFs from a single screen as here:
Ready screen generated by Photobooth Setup Wizard: choice of still photos or animated GIF, and full screen live view (DSLR Remote Pro 3.9 using simulated camera)
Shoot and share without printing
Running a ‘shoot and share’ booth with animated GIFs and no printing is increasingly popular. The DSLR Remote Pro 3.9 Wizard no longer asks you to select a printer when you offer only Boomerang GIFs or Video.
New animated GIFs with audio
You can now add an optional soundtrack to the MP4 copy of your animated GIFs. Learn more
Enhanced animated GIF branding with additional overlay
New: add a second overlay to animated GIFs with branding & logo. The additional overlay is an easy way to brand animated GIFs you have created yourself or sourced from third parties. Learn more
Greenscreen processing – higher quality and faster
Print higher quality green screened images more quickly. DSLR Remote Pro 3.9 green screen algorithms have been rewritten to be bothfaster and produce higher quality results. Greenscreen photobooth
Start the booth when DSLR Remote Pro is started and the camera connected
To start the Photobooth running as soon as DSLR Remote Pro is started and the camera connected and switched on, select Advanced Settings then check the box Start full screen photobooth automatically ….
Starting the photobooth when the camera is connected DSLR Remote Pro 3.8.1
Hide the camera controls on the main screen
DSLR Remote Pro allows you to control the camera from your PC. You can find these settings on the left of the main screen (highlighted in green below).
DSLR Remote Pro 3.8.1 main screen with camera settings highlighted
To hide these settings select View then uncheck Show Camera Controls:
To hide the camera controls at the left of the screen select View then uncheck Show Camera Controls (DSLR Remote Pro 3.8.1)
The main screen will no longer show the camera settings:
Main screen DSLR Remote Pro 3.8.1 with camera controls hidden
Hide or reveal the large Photobooth Shortcut buttons
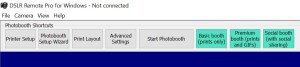
The large buttons at the top of the main screen (highlighted in green below) are called Photobooth Shortcut buttons. They are quick ways to control your booth.
Default Photobooth Shortcut buttons DSLR Remote Pro 3.8.1
To hide or reveal these buttons select View then check or uncheck Photobooth Shortcuts
To hide or show the Photobooth Shortcut buttons at the top of the screen select View then (un)check Photobooth Shortcuts (DSLR Remote Pro 3.8.1)Main screen with both Photobooth Shortcut buttons and camera controls hidden DSLR Remote Pro 3.8.1
Choose which Photobooth Shortcut buttons are shown on the main screen
If necessary show the Photobooth Shortcut buttons as above.
Select View then Photobooth Shortcuts Settings to see the Photobooth Shortcut Setp Screen
Photobooth Shortcut Setting window DSLR Remote Pro 3.8.1
The standard buttons are highlighted in green above. Check or uncheck any of these buttons to change the Shortcut buttons on the main screen. In this example the operator will only see buttons to start the booth and access the Print Layout Editor (which lets them make changes to the Print Layout)
Photobooth Shortcut buttons limited to 2 choices DSLR Remote Pro 3.8.1
You can display any combination of the following standard Shortcut buttons in DSLR Remote Pro 3.8.1
Printer Setup
Edit QR code
Photobooth Setup Wizard
Print Layout
Advanced Settings
Event Info
Videobooth Settings
Reprint Photobooth Photo
Start Photobooth
Take Test Photo
Camera Settings
The default set of five buttons are shown in red in this list.
Change the wording of the Photobooth Shortcut buttons (great for localization)
Select View then Photobooth Shortcuts Settings to see the Photobooth Shortcut Setp Screen.
Photobooth Shortcut Buttons screen DSLR Remote Pro 3.8.1. Shows where to change the text and size of buttons.
1. Edit the text of any button; here Start Photobooth has been changed to Go!
2. You can also change the size of the buttons
3. Press OK to save the new settings before leaving this screen.
Main screen with customized Shortcut Buttons. Start Photobooth has been changed to Go! DLSR Remote Pro 3.8.1
Password protect or lockdown the settings
You can prevent unauthorized access to the Advanced Settings and Photobooth Setup Wizard using Lockdown.
Select view then Lockdown mode..
Setting Lockdown mode in DSLR Remote Pro 3.8.1
Enter a password and press OK to save it.
Lockdown mode is protected with a password
Lockdown prevents unauthorised access to the Advanced Settings and Photobooth Setup Wizard. Operators will still be able to alter the print layout if necessary during an event.
Note: The lockdown password can be reset if necessary. Contact support@breezesys.com for details.
Create your own Shortcut buttons to run specific profiles
Profiles are a powerful tool in Breeze software; they are often used to offer guests choices. You can also use profiles to give the operator a menu of common ways to set the booth up, which are tailored to your business model. Profile 1 might be a basic booth with simple prints; Profile 2 a choice of prints or animated GIFs, Profile 3 prints and GIFs with social sharing. See this post for an introduction to profiles
This section explains how to link profiles you have already created to Shortcut buttons. It does not explain how to create profiles.
Select View then Photobooth Shortcuts Settings to return to the Photobooth Shortcut Setup Screen
Breeze Systems is proud to announce the release of DSLR Remote Pro 3.8. Easier to use and more powerful than ever before, DSLR Remote Pro 3.8 includes two free button sets designed by Wilkes Booth Co.
Highlights of the new release
Fast simple branding for photo booth screens
Create and save new photo booth screen themes
Transfer themes between PCs
Free sets of touchscreen buttons
Create custom caption sets in any almost language
Photobooth Setup Wizard now simplifies screen customization
Brand screens quickly and easily with new DSLR Remote Pro themes
Create themed photobooth screen sets
Create, load and save DSLR Remote Pro themes containing screen background, touchscreen button, and caption sets
DSLR Remote Pro 3.8 theme including (A) screens, (B) buttons & (C) captions
A. Complete sets of custom photo booth screen backgrounds can now be generated from a single image. The same background image can be tiled, stretched or cropped to fit any screen with new themes
DSLR Remote Pro 3.8 single background_tiled.jpeg image used to create themed set of background screens
B. Create your own buttons or choose from those shipped with DSLR Remote Pro 3.8. Touchscreen buttons can be placed below the image or to one side using the Setup Wizard.
C. Customize captions in almost any language. Adjust the color of your text.
Transfer themes between PCs
To generate themed screens on PCs with different screen size/aspect ratio by just copy the theme to the new PC and run thePhotobooth Setup Wizard.
Free touchscreen button sets
Breeze DSLR Remote Pro 3.8 includes 2 new free button sets created by Wilkes Booth Co
DSLR Remote Pro 3.8 Welcome screen: Wilkes Booth Co Tradewind White buttonsDSLR Remote Pro 3.8 Sharing screen: Wilkes Booth Co Tradewind Blue buttons
Choose whether to run buttons across the screen or to the side using the Photobooth Setup Wizard.
Create custom caption sets
Breeze software is used in over 80 countries world wide. DSLR Remote Pro already supports Unicode and handles characters in most languages. Use the Photoboth Setup Wizard to create reusable caption sets, and apply them to different themes.
DSLR Remote Pro 3.8 is shipped with English, German, Polish, Italian and Romanian captions.
This is the first of a series of posts explaining how to setup your photo booth using the DSLR Remote Pro 3.7.3 Photobooth Setup Wizard.
Getting Started with DSLR Remote Pro (2) will explain how to customize your prints. Getting Started with DSLR Remote Pro (3) will explain how to customize your screens.
Downloading the program
First download DSLR Remote Pro from our website; and install the program on your computer. You can run the program as a free trial for up to two weeks from the day you download it.
Downloading DSLR Remote Pro 3.7.3 from http://breezesys.com/downloads.htm#dslr
Start the program. If you are running a trial version of the program you will see the registration window each time you start. Click on Evaluate.
DSLR Remote Pro 3.7.3 registration dialog
There are five buttons at the top of the main screen. They are shortcuts to the most used parts of the program.
DSLR Remote Pro 3.7.3 Photobooth Shortcut buttons
Printer Setup
Photobooth Setup Wizard
Print Layout
Advanced Settings
Start Photobooth
First connect your printer to the computer and switch it on. You can also connect and switch on your camera now; or use the ‘simulated camera’ at this stage.
Select Printer Setup to tell DSLR Remote Pro about about the printer you intend to use. Choose prints in Portrait or Landscape orientation.
Hint: Portrait is used for narrow strips of 3 or 4 photos, unless you have a DNP printer.
DSLR Remote Pro 3.7.3 Printer Setup screen showing Landscape oriented 6″ x 4″ print layout (non DNP printers)
Hint: For DNP printers using 6″ by 4″ media portrait and landscape orientation are swapped.
DSLR Remote Pro 3.7.3 Printer Setup screen showing Landscape oriented 6″ x 4″ print layout ( DNP printers only select ‘Portrait’ instead of ‘Landscape’)
Finish by clicking on OK.
Now start the PhotoboothSetup Wizard. The program will prompt you to save any existing settings before the wizard overwrites them
DSLR Remote Pro 3.7.3 check at start of Photobooth Setup Wizard
At Step 1 you choose the photo layout you need. The wizard offers a choice of 8 popular layouts; if you want something different choose whichever is closest to your design (you will be able to change this later).
DSLR Remote Pro 3.7.3 Photobooth Setup wizard step 1. Landscape layout with 1 large and 3 small photos
Next Step 2. Tell the program which folder to save the photo booth photos you are going to shoot.
DSLR Remote Pro 3.7.3 Photobooth Setup Wizard Step 2
Finally choose the options you want to offer your guests.
The first 5 check boxes tell the Wizard whether you are using a touchscreen, whether guests can choose between color and B&W prints, whether to display a preview of each photo after it is taken and the maximum number of prints allowed.
The next five check boxes tell the wizard whether a sharing screen (after the photos are taken) should offer uploads to guest’s Facebook and/or Twitter account, share photos by email or MMS/SMS, or offer optional printing. Hint: some operators prefer to offer browsing and sharing from a kiosk separate to the booth. You can use Breeze Kiosk for this. To share and print photos away from the booth leave these boxes unchecked.
Beginners should leave ‘Add a background.jpeg’ blank at this stage. Print layouts can be branded/customised later.
To offer ‘boomerang’ animated GIFs check ‘Enable videobooth..’ and ‘Capture Boomerang GIFs..’.
To offer video booth check ‘Enable videobooth..’
Click on <Finished> and you will see a final screen reminding you where the screen and print layouts created by the wizard have been stored; and where photos taken today will be stored.
DSLR Remote Pro 3.7.3 Photobooth Setup Wizard completed
Close this window, connect your camera and switch it on before selecting ‘Start Photobooth’. That’s it!
DSLR Remote Pro 3.7.3 default photo booth screen created by the Photobooth Setup Wizard


You must be logged in to post a comment.