Tag Archives: Featured

Breeze Booth 1.0.9 Magical Background removal

Breeze Booth for iPad 1.0.9: Green screen … without the screen

AI based Background removal is a great alternative to green screen. The quality is awesome, there’s no cumbersome backdrop, and lighting is much simpler. It doesn’t even matter when your guests wear green.

My clients want green screen… until they see the backdrop. This is what I need (Meir Israel)

You’ve just shifted my entire attitude. This is why I’m here [ Photo Booth Expo 2020]

Background removal for prints and slideshow GIFs

Breeze Booth for iPad 1.0.9 adds support for third party background removal services. At the time of writing, these are available from both Gadbooth and  removebg.

Make the most of free time

There’s no charge to try Breeze Booth. Gadbooth  are offering a 30 day free trial if you sign up by 23 March 2020, and removebg currently offer 50 free previews per month.

What else is new in Breeze Booth 1.0.9?

  • AirDrop sharing
  • Pre-registration for large events
  • New demo event for background removal

AirDrop

Share photos, animated GIFs and MP4 movie files directly to guests’ devices with Apple’s AirDrop.

Add AirDrop sharing to your sharing screens using the touchscreen actions stillsShareAirDrop and gifShareAirDrop

Pre registration

Breeze Booth can be run as a fully functional registration system at trade shows, conferences and large events. Registration iPads capture guest survey data, which can be printed ( with or without a photo) as an ID card .

Pre-registation with background removal on the Breeze stand at Photo Booth Expo 2020 .. ID cards don’t have to be dull.

New demo event for  background removal

Check out background removal with the new demonstration event included with Breeze Booth 1.0.9 and Event Editor 1.4.

Note: Existing Breeze Booth users may need to import the new background removal event into Event Editor 1.4 from from C:\….\Documents\Breeze Booth for iPad\events\AI Background Removal  . Select events_info.xml

Download Breeze Booth, Hub & the Event Editor

Upgrades to the latest versions of Breeze Booth for iPad, Hub and the Event Editor are all free. Download the current versions here

  • Breeze Booth for iPad runs on iPads and iPhones running iPadOS, iOS13 and iOS 12
  • Breeze Hub and Event Editor run on both Windows 10 and Windows 8

There’s no charge to try Breeze Booth – Get started

Check which version you are currently running

On your iPad/iPhone

Open Breeze Booth and select Settings. The program version is displayed at the very end of this screen.

Check which version of Breeze Booth for iPad you are running on the Settings page

You can also check whether there are updates available by selecting Breeze Booth in the App Store. If you are running an older release you should see a blue UPDATE button.

Event Editor and Hub

Start the program, click on Help then About… . The program version is displayed in a small pop up window.

Check you are running the latest vrsions  of Breeze Booth Event Editor & Hub


© Breeze Systems March 18 2020

Glamazon activation (The Photo booth Guys)

Thanks to Steve Bliesner & Photo Booth Guys Australia  for letting us share this video of their latest activation for Amazon.

Steve writes

Working in harmony to create high end activations that go out for, not $100-200 an hour.. but $1000 – $ 2000 an hour.

I used every trick in the Breeze book to pull this one off.

Breeze for iPad was running a very custom survey to collect data on guests, to determine what Drag Queen they would be and what personalised text they wanted on their GIF and Print. Additionally, guests entered their email address (so they didn’t have to use a sharing station later).

That data was sent via Breeze Hub, to Breeze Kiosk, where a QR code had been generated, and was then scanned in via a barcode reader, by our staff, in to Breeze Webcam.

Webcam had a customised interface that was live streamed to two large screens… (that masked any sensitive information and removed any interface control elements).

With one scan, that QR code kicked off the session, auto chose the chosen Drag Queen, personalised their print and GIF and emailed the image to the guest.

There is only one company that makes software that allows people like you and me to do stuff like this.

Meet Steve at the Breeze stand (#1113) at Photo Booth Expo next week.

Using Snap Chat lenses with Breeze

Snap Chat has an awesome library of virtual props or  ‘lenses’. Did you know that you can use these lenses to add an incredible variety of  virtual props to   Breeze Booth (Webcam +Windows) aka Webcam Photobooth?

Check out our new Snap Camera tutorial to learn more.

This tutorial walks you through integrating Snap Camera with Webcam Photobooth to add amazing 3D ‘lenses’ (virtual props) to your photos, GIFs and videos.

Chris has also updated the Webcam_Snap_Camera.ahk script to add a shortcut showing the toolbar position, and improved the  sending of shortcut keys.

What is Booth (Webcam + Windows)?

Previously known as Webcam Photobooth, this Windows app turns a webcam into an event photo booth, creating fun GIFs, prints and videos. Webcam Photobooth is a one-off purchase costing just US $175*, and includes one year’s free upgrades.

Download Webcam Photobooth      Buy Webcam Photobooth

*Price valid at time of writing, and excludes any tax due.

Breeze Systems February 2020


Speedier MP4 creation with Multi-Camera 2.1

Did you know that Breeze Multi-Camera v2.1 introduced an option for the Multi-Camera Animator to use Microsoft MediaWriter instead of ffmpeg to create MP4 videos?

  • Microsoft MediaWriter libraries are much faster
  • ffmpeg libraries are more flexible and still appropriate for some applications

For more information see the online manual

Try for yourself

Multi-Camera 2.1 is a free upgrade for all registered users who purchased Multi-Camera (previously called DSLR Remote Pro Multi-Camera) after 28th November 2017. Customers with older licenses need to buy an upgrade license to use this release.

New to Multi-Camera? Just download a copy of the program and try it for free. You can run the program with up to 4 cameras for 2 weeks on the fully functional evaluation license.

Download Multi-Camera                Buy Multi-Camera

Thank you for taking the time to read this post. Do share it with others who may find it useful.

© Breeze Systems 2019

Adding guest names to prints with DSLR Remote Pro

Several of you want to include guests names on DSLR Remote Pro prints. This post shows you how.

You can either start from an existing design, or run the setup wizard to create something completely new. You then need to

  1. Create a keyboard where guests are prompted to type in their names
  2. Choose whether to enter names before or after taking the photos
  3. Add a caption to your print layout showing the name

Updates 21 August 2019

  • Reprint note: Fast reprint runs off a copy of the original print layout (with the data guests have already entered )
  • Post updated to correct error adding guest details after taking photos.

Create the keyboard where guests enter their names

Go to Advanced Settings and select the Touchscreen Settings screen

On this screen, click the Test Keyboard button, then choose Message keyboard from the dropdown menu

The Touchscreen Settings screen is accessed from Advanced Settings as here (DSLR Remote Pro 3.14.1)

Hold down the Shift and Ctrl keys and left click your mouse.

This will save five files to your photo booth images folder: message_keyboard.xml, message_keyboard_lowercase.tif, message_keyboard_lowercase_pressed.tif, message_keyboard_uppercase.tif, message_keyboard_uppercase_pressed.tif

PhotoboothImages folder highlighting the 4 tif files you need to delete and the xml file you need to rename

Go to your PhotoboothImages folder and

  • delete these 4 tif files
  • rename message_keyboard.xml as keyboard.xml 

My PhotoboothImages folder then looks like this:

PhotoboothImages folder after deleting and renaming files

Now open keyboard.xml in a text editor such as Microsoft Notepad (which comes free with Windows 10) and change the wording of the prompt from Please enter your message to Please enter your name (or whatever text you prefer).

Original keyboard.xml prompt
Original prompt text in keyboard.xml
Revised prompt text in keyboard.xml

Save your changes and close the text editor.

The edited version of keyboard.xml will build a touchscreen keyboard looking like this:

Keyboard screen for guests to type in their name. (The new prompt has been highlighted)

Advanced users: may wish to make other changes to the xml to customize this screen. See Collecting both guest names and a message below for an example.

Choose whether guests enter their names before or after taking the photos

You can control whether guests type in their names before or after taking the photos. Just select Email input at start of sequence  or Email input after taking photos on the Touchscreen settings screen as below

Use the drop down menu to choose whether guests type in their names before or after taking the photos (DSLR Remote Pro 3.14.1 Touchscreen settings screen)

Extra screen when collecting guest data after taking photos

If you choose to collect the information after the photos are taken, you need to add an extra screen to your PhotoboothImages folder called keyboard_input_ok.jpg. This will be displayed for a short time after guests enter their data and hit OK.

You can create this screen by taking a copy of a blank screen such as taking.jpg and renaming the copy.

Showing keyboard_input_ok.jpg screen in PhotoboothImages folder

So far we have created a screen for guests to enter their names. Now we need to adapt your print layout to add these names.

Add a caption to your print layout which displays these names on the print

Open the Print Layout Editor and right click anywhere on the print. Select Add caption

Right click anywhere on the print to add your caption ( DSLR Remote Pro 3.14.1 Print Layout Editor)

To display the guests names, your caption must include the token {user1_data}. Adjust the font, color, position and angle of the caption as usual:

Caption text including the token {user1_data}

When you run the booth the name(s) guests enter will replace {user1_data}

In this example the guests type Josie & Pete


… and their names are included in the print

You can combine these dynamic captions with the signing and drawing screen, including the ability for guests to choose the picture frame

Guests can add also stamps, emoji &/or frames, as well as draw or sign on prints (DSLR Remote Pro 3.14.1)

Learn more

I have shown you how to add each guest’s name to prints. Taking this a bit further

Collecting both guest names and a message

Thanks to Caroline & Josh www.giggleandriot.com for allowing us to use these lovely examples

To collect more information such as a message make these changes to keyboard.xml:

  1. Make room to collect a second data item
  2. Add a second prompt and data field, 
  3. Change the background color of the screen.
  4. To display the extra information on the print add a caption including {user2_data} to the print layout
Here I have edited keyboard.xml to (1) Make room to collect a second data item (2) Add a second prompt and data field, and (3) change the background color of the screen. To display the extra data on the print add a caption including {user2_data} to the print layout

Useful links

Try for yourself

Download DSLR Remote Pro       Buy DSLR Remote Pro

Thank you for taking the time to read this. Do share the post with others who may find it useful.

© Breeze Systems 2019


Multi-Camera Academy

Greetings everyone! My name is Peyton Vincent with CEG Interactive, an award-winning company that specializes in photo booth rental in San Diego as well as specialty photo activations nationwide. I first started using Breeze Systems software in 2007 with our very first portable photo booth. Back in those days, we were renting photo booths for weddings and parties but as we expanded our offerings, our clientbase grew to include concert tours, conventions, and sporting events nationwide.

While the majority of our jobs have relied on DSLR Remote Pro over the years, we found our niche by being photo booth technologists and innovators that wanted to constantly find new ways to re-invent the photo booth. We also regularly use Hotfolder Prints, Breeze Viewer, Webcam Photo Booth, Breeze Kiosk, and last but not least, Breeze Multi-Camera.

I have been invited by Chris and Sue to write some helpful features that are focused mostly around that last one which goes by a bunch of different names. See how many you recognize!

  • 3D Photo Booth
  • Bullet Time Photo Booth (inspired by the iconic scenes of “Neo” dodging bullets during the climax of “The Matrix” back in 1999.
  • Multi-Camera Array (or just “Array”)
  • 180 Photo Booth
  • 360 Photo Booth
  • And more I’m sure!
“Neo” dodging bullets in “The Matrix”

What is a Multi-Camera Photo Booth?

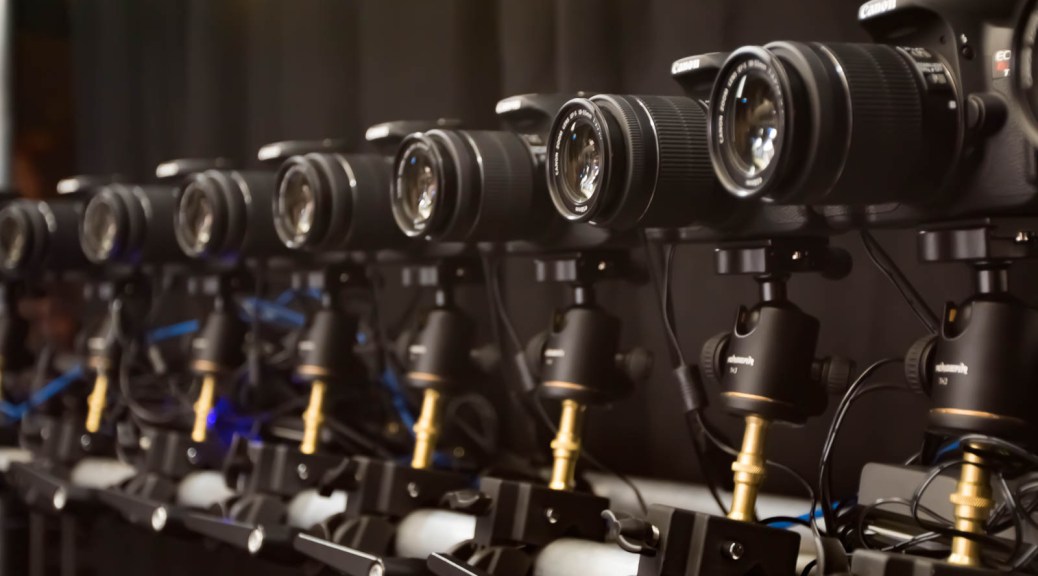
Other than the obvious, a multi-camera array photo booth consists of a system of interconnected cameras that are usually defined as follows:

  • Rigidly-attached to a curved structure that keeps them from shifting
  • Aimed at a central point or axis
  • Evenly-spaced so that the animation effect shifts between the cameras at a constant speed
  • DSLR cameras and lenses are of the same make/model/focal length. Breeze Multi-Camera is designed to tether exclusively with Canon DSLRs. However, with some custom work, it’s probably possible to use the animator program with image file sets captured by cameras of a different make.
  • Each camera is fired in either a “chase” where there’s a specified delay between each angle which creates a “virtual dolly” and/or slow motion bullet time effect OR they are all fired at the exact same instant to create a true “time freeze” effect.

I’m a visual guy (which is probably why I’m a photo booth nerd instead of a writer) so lets move on to the fun stuff…photo examples! I will end this first article with a multi-camera comparison guide that shows you how the number of cameras, type of backdrop, triggering method, etc can create a wide variety of different effects.

2 Camera “3D Photo Booth”

3D Photo Booth CEG Interactive
Event guests showing off their stylish 3D glasses and 3D photo prints!
Full color traditional photo prints as well as anaglyphic prints that can be viewed in 3D with the red/blue 3D glasses.

6 Camera Array Photo Booth

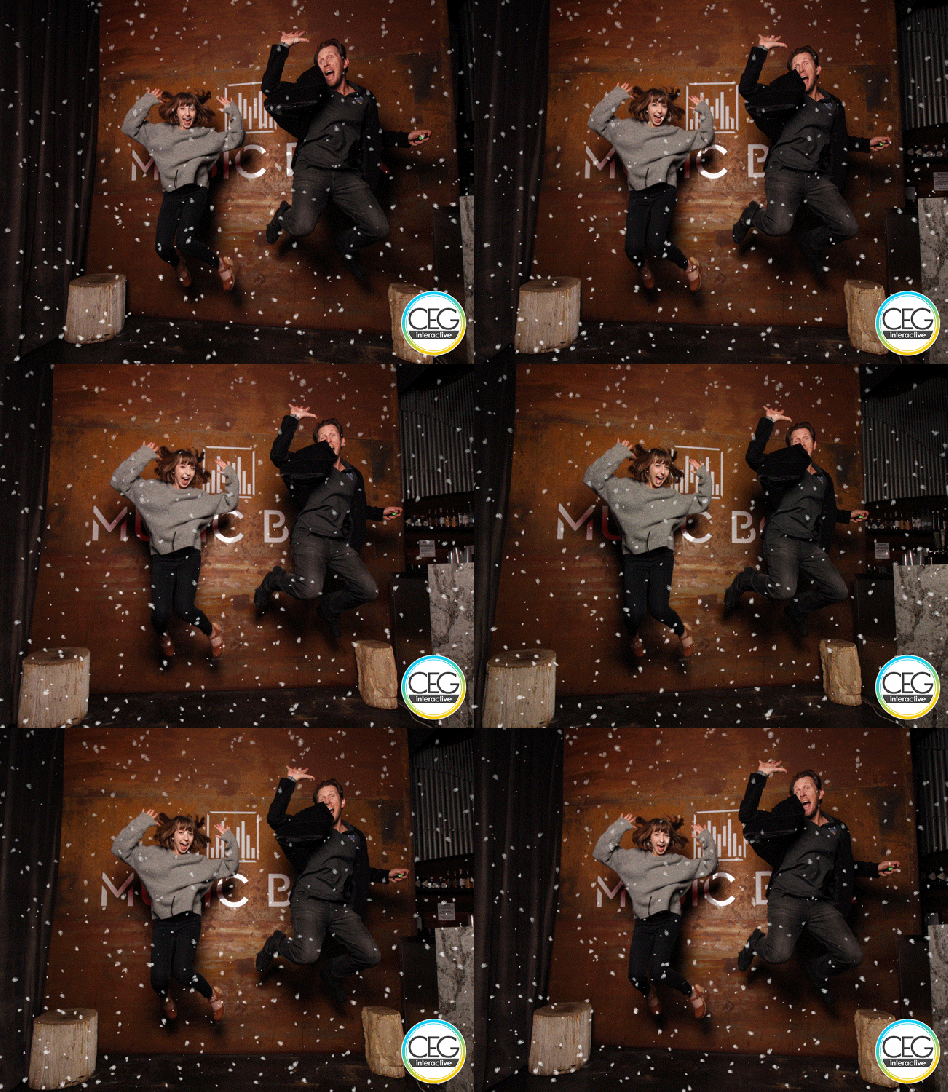
6 camera array with printed 10×10 tension fabric backdrop
6 camera photo booth with a 10×14 printed backdrop

7 Camera – Super Wide Angle

6 camera array using Canon EF-S 10-18mm Super Wide Angle Lenses.
This was a test shot and we ended up fine tuning calibration before the event began.

6 Camera – Green Screen Array

12 Camera Array – 3D Light Painting

12 Camera Array

We used two 9×9 black sequin backdrops for this shoot.

12 Camera Array – Green Screen

3D green screen confetti plus hand-tossed white confetti!

12 Camera Array – Creative Set

12 Camera Array – Green Screen with 3D artwork

12 Camera time slice effect with custom 3D graphics for concert photo activation

18 Camera Array – 180 Photo Booth

18 Camera Array – Time Delay Trigger “Virtual Dolly” Effect

Please stay tuned for our next feature were we cover more topics like hardware component selection, software settings, system design, and more! In the meantime, check out our website more information about the multi-camera photo booth services that we offer to our customers at CEG Interactive.

Which camera is best for my photo booth?

We are often asked which camera is best for a photo booth. Canon cameras have very good live view quality, an important attribute for photo booths. The models below are not the only cameras you can use. Many older Canon DSLR cameras work very well. You can find a button linking to a list of the cameras you can use with Breeze DLSR Remote Pro here.

At the time of writing* (September 2021) we believe the ultimate photo booth cameras are ….. the mirrorless Canon  EOS M50 Mark II and EOS M50 . For photo booth use there is no practical difference bewtween the two.

The standard kit lens ( EF-M 15-45mm STM ) has a flexible 15-45 mm zoom. For a super slim booth, try the EF-M 22mm STM lens

Best: Canon EOS M50 Mark II and EOS M50

Update: February 2019 Canon have released firmware version 1.0.2 for the M50 which fixes the issues with triggering external flash. The new firmware can be downloaded fromCanon’s UK site 

A big thank you to Caroline Winata of Giggle and Riot Funbooth  for sharing this example of slow motion video (EOS M50 with DSLR Remote Pro 3.10)

  • 120FPS Slow motion video with no additional processing
  •  Similar performance to the Canon EOS 200D/Rebel SL2 including Canon’s excellent dual pixel auto focus in live view.
  • Suitable for video with external microphone socket.
  • Compact, slim and light; the M50 will fit in a smaller housing than Canon’s DSLR cameras.

July 2018 This post has been updated to include cameras supported in DSLR Remote Pro 3.11.2 ie the  Canon EOS 1500D (aka Canon EOS 2000D/Rebel T7/EOS Kiss X90) and Canon EOS 3000D (aka Canon EOS 4000D).

The photo below shows the different sizes of the EOS M50, EOS 200D/Rebel SL2 and new EOS 2000D/1500D/Rebel T7:

Photos of Canon EOS M50, 200D and 2000D with kit and pancake style lenses
[top to bottom] EOS M50 with EF-M 22mm STM lens, EOS M50 with standard kit lens EF-M 15-45mm STM , EOS 200D/Rebel SL2 with 24mm pancake lens, EOS 2000D/1500D/Rebel T7with 18-55mm kit lens

Disadvantages

  • Access for external power is underneath the camera instead of at the side.

Photo of Canon EOS M50 showing power cable attached to base of camera
The external power cord connection for the M50 is on the camera base

  • Update February 2019

Canon have released firmware version 1.0.2 for the M50 which fixes the issues with triggering external flash. The new firmware can be downloaded from the Canon UK site (There was a bug in the original firmware of the Canon EOS M50 which meant that triggering an external flash or studio strobe via the hotshoe could be unreliable. We reported this bug to Canon, who have fixed it.)

Good for video: 200D/Rebel SL2, 850D/Rebel T8i/Kiss X 10i

These cameras do everything the M50 can do except slow motion video. They are larger and heavier than the M50.

  • Excellent auto focus in live view
  • Suitable for video & have an external microphone socket

Budget: 1300D/T6

Good for still photos and boomerang and slideshow animated GIFs. Slightly higher resolution live view than 200D or 800D.

Disadvantages

  • No external microphone socket so not a good choice for video including sound.
  • Power zoom is not supported.
  • Old model becoming difficult to source new
  • Autofocus less reliable

Canon 2000D/1500D/Rebel T7

(Updated 25 February 2020)

The 2000D/T7 is an update of the popular Canon EOS 1300D/Rebel T6 with a higher resolution 24 mega pixel sensor. Unfortunately Canon initially removed the center contact on the hotshoe. This means early versions of this camera cannot trigger most external flashes or studio strobes so is not recommended for photo booth use.

Tuesday 25th February. Canon announced at Photo Booth Expo that the EOS Rebel T7/2000D camera has been  updated to add a center contact (X sync) on the hotshoe, making this a great budget choice for photo booth users. More details.

Canon EOS 4000D/3000D

Similar to the Canon EOS 1300D/Rebel T6 with the same 18 mega pixel sensor but cheaper build quality (plastic lens mount, fewer buttons, no remote release socket and no cable access for external power). This camera has no center contact on the hotshoe. This means the camera cannot trigger most external flashes or studio strobes so is not recommended for photo booth use.

Web cameras & iPad booths

This post does not cover booths powered by web cameras or the built-in cameras provided with iPads, laptops and tablets. Breeze Booth (iPad + iPhone) uses either the device’s built in camera or Canon EOS DSLR cameras, some mirrorless and PowerShot models. Breeze Webcam Photobooth software will run a booth with either a webcam or built in camera in a Windows 11, 10 or 8 PC or laptop.

*This post has been updated in November 2021.  As new cameras are introduced this post will inevitably become outdated.

© Breeze Systems 2021

Shooting Square photos with Breeze DSLR Remote Pro 3.9

Check a single box in the Photobooth Setup Wizard to shoot and print square photos using Breeze DSLR Remote Pro 3.9.

Usually photo booth images are shot in ‘landscape’ mode; so that you can comfortably include several people in the shot. Sometimes we want to vary this.

Run the Photobooth Setup Wizard

Start DSLR Remote Pro and run the Photobooth Setup Wizard (1) to set up a basic booth, selecting a square live view (2) at Step 2.  DSLR Remote Pro allows you to customize your booth setup without connecting the camera.

Selecting square live view using the Photobooth setup Wizard: DSLR Remote Pro 3.9.1

In this example I have chosen a single photo (3) at Step 3.

Photoboth Setup Wizard: selecting a singe lphoto DSLR Remote Pro 3.9.1
Photoboth Setup Wizard: selecting a single photo DSLR Remote Pro 3.9.1

Customize the print layout

Print Layout Editor button DSLR Remote Pro 3.9.1 main screen
Opening the Print Layout Editor DSLR Remote Pro 3.9.1

When you open the Print Layout Editor you will see that the print layout is square. Customize your print as usual.

Shows DSLR Remote Pro 3.9.1 Print Layout Editor with single square print
Square Photo layout in Print Layout Editor DSLR Remote Pro 3.9.1

Start the photo booth

Select Start Photobooth to run the booth DSLR Remote Pro 3.9.1

The Photobooth Setup Wizard has cropped both the live view and print layout for you.

Default ready screen for square photo DSLR Remote Pro 391.jpg

Square photos can be combined with filters to give a pop art effect, or used singly for a ‘polaroid’ look.

Ready for more? You can also create round (or any other shape) photos using  a live view overlay and print overlay. You will need to create these overlays in an image editor such as Photoshop. The DSLR Remote Pro help files explain how to customize screens and prints in more detail.

Copyright Breeze Systems 2018

Free print templates for DSLR Remote Pro and Webcam Photobooth

A big thank you to Tomasz Klusczyk of SMOVE, who has generously shared a set of print layouts for Breeze owners to use with DSLR Remote Pro, Hotfolder and Webcam Photobooth.

Download SMOVE 6”x4” (15cm x 10cm) print templates

Download SMOVE 6”x8” (15cm x 20cm) print templates

Note: Webcam Photobooth users need to select the “DSLR template compatibility” option at Step 3 of the Photobooth Setup Wizard to use these templates:

Selecting DSLR template compatiblity mode Webcam Photobooth 2.4
Selecting DSLR template compatiblity mode using the Setup Wizard in Webcam Photobooth 2.4 S

Find out more

Download DSLR Remote Pro, Hotfolder and Webcam Photobooth

SMOVE logo

SMOVE is a Polish photo booth vendor who design and sell photo booths powered by DSLR Remote Pro thoughout Europe.

Copyright Breeze Systems Ltd 2018. Breeze Systems is not responsible for the content of external sites