Breeze Booth for iPad – What can it do?

Complete creative freedom

Breeze Booth for iPad is a powerful photo booth app that has been designed with flexibility, redundancy and creativity in mind. Design unique, custom interfaces/user experiences and quickly deploy them to a fleet of iPads using trusted cloud services (Dropbox, iCloud etc) or via your own private and secure web servers.

Click video above to see Breeze Booth for iPad in action

Key Features 

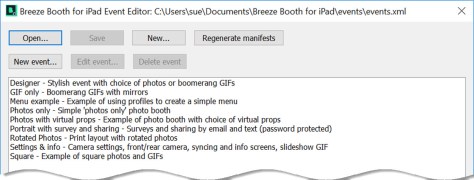
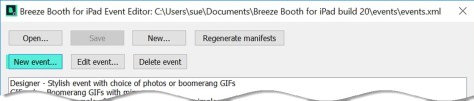
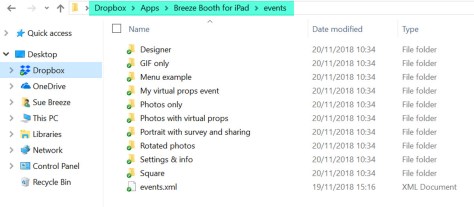
  • Centralised set up of events, interfaces and image branding via a Windows-based app
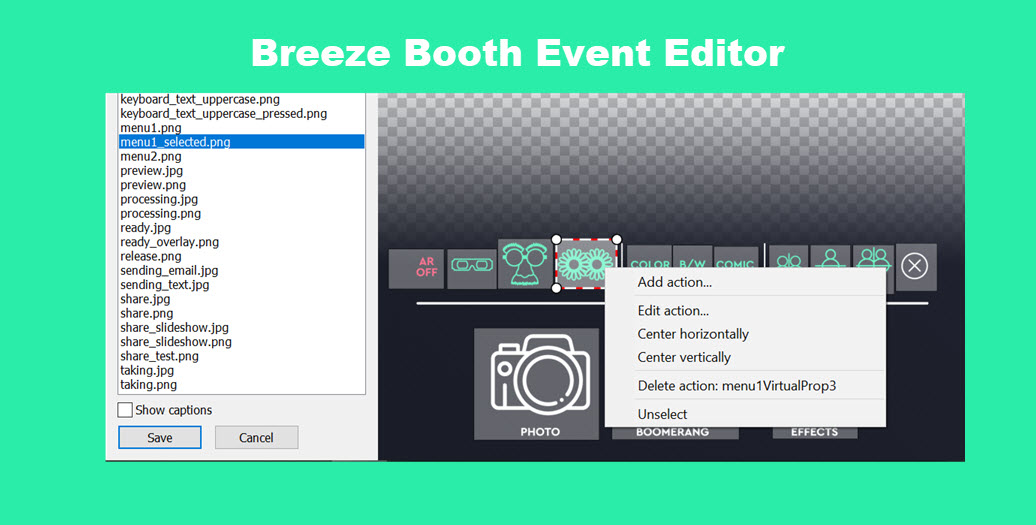
  • The industry’s most flexible interface designer
  • Make digital photos, prints and GIFs and use digital A/R props
  • White label the app interface and sharing features (as a standard inclusion)
  • Standalone capability and redundancy  (events can run offline, deploy your own private and secure sync and image sharing servers)
  • Advanced features for power users (profiles, tokens, unique ID’s, keyboard shortcuts, access to XML information etc)

Breeze Booth Standalone Operation

Breee Booth can run as a simple photo booth app, with loads of  features available out of the box.

  1. Shoot still images, slideshow and boomerang/burst GIFs
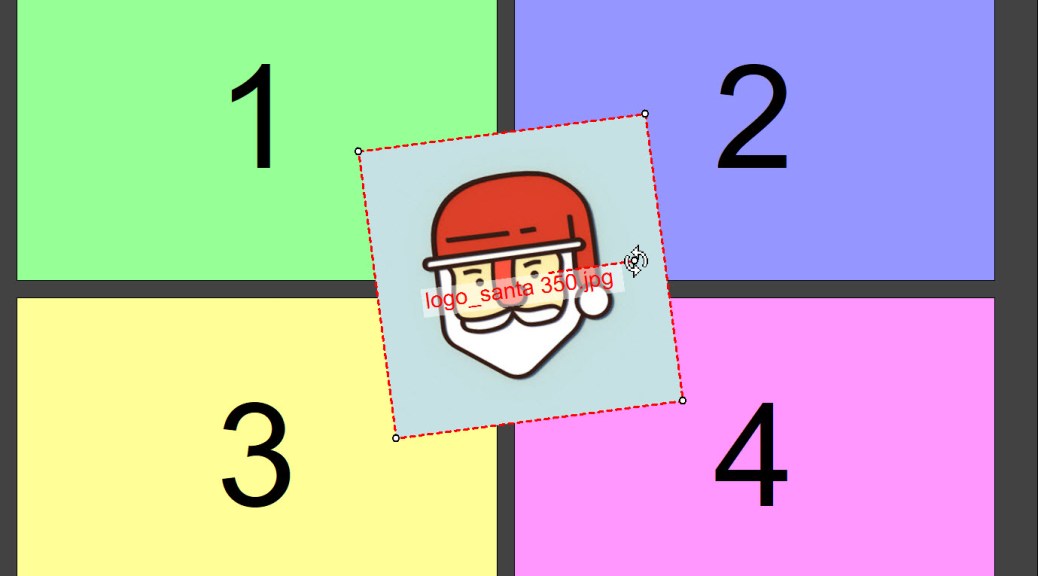
  2. Virtual props
  3. Standard image filters and effects: Color, B&W, sepia, comic and mirror effects
  4. Create and import  your own custom photo filters
  5. Control camera settings (digital zoom, ISO, shutter speed, white balance, tint) 
  6. Switch between front and rear cameras
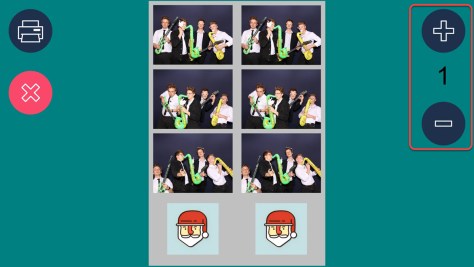
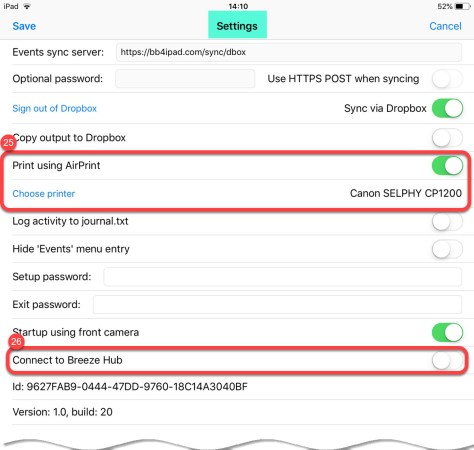
  7. Printing of images (including AirPrint printers)
  8. Email images directly from the iPad
  9. Local storage of photos, prints and GIFs on the iPad
  10. Sync images & XML data to Windows PC for sharing, printing and export to other Apps 
  11. Sync images to Dropbox
  12. Log email addresses and cell phone numbers
  13. Collect guest survey and consent data
  14. Display privacy statements, terms & conditions, and other information screens
  15. Sync events from Dropbox or your own private and secure web server
  16. Transfer events to your iPad via AirDrop (no internet required)
  17. Password protect events and App settings
  18. Run events without an Internet connection
  19. Retain complete control of images and guest data

Breeze Booth + Breeze Hub at your event

Extend the power of Breeze Booth and add Breeze Hub to the mix. Breeze Hub is a small but powerful Windows companion app that can be run at your event, to allow for single or multiple Breeze Booth iPads to print to any Windows printer. In addition, it can also share images via email and SMS without having to use external cloud services. All done locally at your event.

  1. Print to any Windows printer (including professional dye sub printers)
  2. Offline sharing of photos, animated GIFs, and MP4 files
  3. Support sharing from multiple iPads, DLSR based booths and Kiosks with a single Internet connection at your event
  4. Monitor local iPads & display current status and images taken
  5. Share event name and other event data with local iPads

Breeze Booth + Breeze Hub + Event Editor at your office

For power users, centrally manage the syncing of multiple events, and sharing of images from your office, home or secure web server. With Breeze Hub and Event Editor, you can completely control how data is shared to your iPads and how images are sent to your guests; allowing you to create a redundant, secure and private system.

  1. Create, adapt and update events for use worldwide from your PC
  2. Design screens, prints, GIFs and email content for multiple events
  3. Sync new & updated events through your own private and secure webserver
  4. Sync new & updated events with iPads via Dropbox
  5. Centrally share images from multiple events, iPad and DLSR based booths and kiosks from your own office or server. 
  6. Run external commands on images as they are received

Creative Outputs

  • Prints with custom background, overlay, captions graphics and logos
  • Change text on prints locally/on the iPad
  • Slideshow GIFs ( with animated overlays, backgrounds and titles)
  • Boomerang/burst GIFs (also with animated overlays, backgrounds and titles)
  • Share images by email and text (sharing by text requires microsite)

Industry standard image formats are suitable for sharing with other devices and programs, and uploading to the cloud

Applications

  • Social events
  • Corporate activations
  • 360 degree rotating and slider systems
  • Slider systems
  • Fixed installations
  • Trade shows and conventions
  • Unattended booth in a box rental
  • Large multi-location events with unlimited number of iPads
  • White label events

Additional features include 

Screens

  • animate screens and count down with animated GIFs
  • create menu driven interfaces
  • design for 4:3 and iPad Pro 11 
  • drag and drop screen editor
  • pre-designed interfaces
  • interface and captions in any language
  • configurable optional and mandatory surveys
  • design for both landscape and portrait-oriented iPads

Print Layout Editor

  • drag and drop layout editor
  • add custom background, overlay, captions and logos 
  • add jpg or png logos to prints
  • multiple captions 
  • Captions can include date, event and other tokens
  • Design for multiple print sizes and dpi

Prints

  • Print strips, landscape, portrait, square, panorama and other designs
  • supports high speed professional printers
  • Supports any printer with full Windows drivers for Windows 10, 8 or 7 (using Hub)
  • AirPrint directly from iPad

Animated GIFs

  • create simple multi photo gifs from your photo session
  • print high quality images from your gif
  • make short boomerang / burst gifs
  • apply animated overlays and backgrounds
  • optional sharing as MP4 movie

Sharing by email and text

  • Online and offline sharing of photos, animated GIFs and MP4s
  • Email address and cell phone logging 
  • Email directly from iPad
  • Share via Breeze Hub
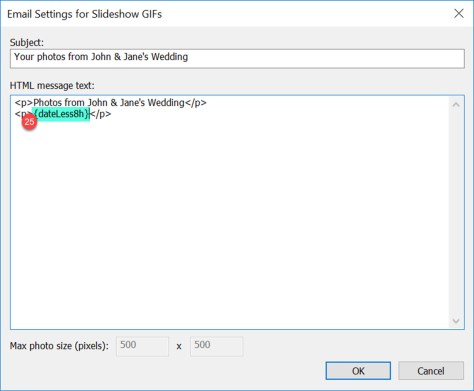
  • White label html emails 
  • Customise email ‘From’ address, subject and content
  • Automate customisation using event, date, media type and other Breeze tokens
  • SMS texting to both Apple and Android cell phones

User Privacy

  • Custom consent and privacy notice support
  • Rejected images deleted automatically 
  • Photos saved to different folders by privacy options/answers to survey questions
  • Control location of saved images

Advanced Features

  • Menus
  • Breeze profiles 
  • Breeze tokens
  • Random* filename generation {UID}enhances guest privacy (virtually impossible to guess filename)
  • Access data from external applications via XML
  • Interfaces & captions in any language, international character sets
  • Control App with external buttons, motion sensors, USB HIB etc
  • Include tokens in update server URL/Dropbox path

*Filenames generated are guaranteed to be unique for at least 2 years on that iPad

Try Breeze Booth for iPad yourself

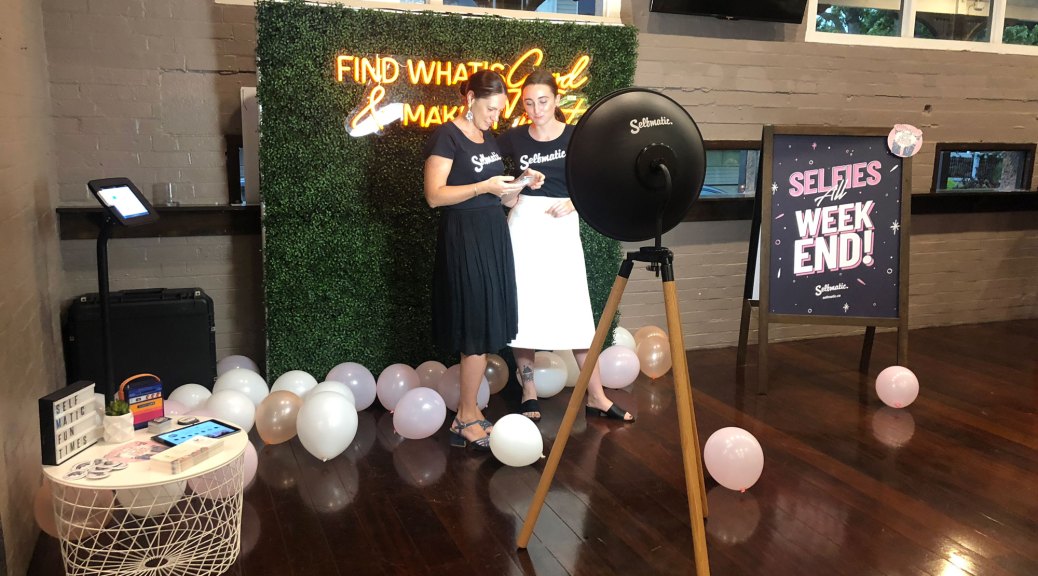
Images courtesy of PhotoBoothGuys

© Breeze Systems 2018

Breeze Kiosk 1.5 released

Breeze Kiosk 1.5 – what’s new

  • Optional QR code display which guests can scan with their phones to access a third party microsite or other website
  • Option to print multiple copies as separate documents to increase throughput when using printer pooling
  • Emails can include CC email addresses
  • XML copy of the email can include additional attachment information when sending MP4 files
  • Much faster uploading of images when sharing by text or Twitter
  • Fixed an issue where the wrong image could be emailed if a new image arrives while an email address is being entered

Introduction to Breeze Kiosk

What does Breeze Kiosk cost?

Each Breeze Kiosk license costs just US $150 for a lifetime license & one year’s free upgrades. For this great price you can run one kiosk and have a second backup/office copy of the program.

If you buy Breeze Kiosk at the same time as DSLR Remote Pro or Hotfolder Prints it costs just US $100 .

Breeze Kiosk 1.5 is a free upgrade for all registered users who purchased a license on or after 28th November 2017. Customers with an older Breeze Kiosk license can buy an upgrade license for just US $75 to use this release.

Prices quoted are correct at 28th November 2018, and are valid for online sales from our website. They exclude any tax due.

How to get your hands on it

Download Breeze Kiosk and try it for yourself for up to 14 days before buying a license.

Download and try Breeze Kiosk 1.5

Buy full license   Buy upgrade license

© Breeze Systems 2018

Breeze Multi-Camera 2.1 released

This release enhances Photo Booth Mode and adds support for Canon’s EOS R camera.

Breeze Multi-Camera 2.1 – what’s new

  • Support for Canon EOS R camera

  • Photo booth mode  supports cameras in portrait as well as landscape orientation
  • Photo booth mode includes new screen  ready_no_live_view.jpg . This disables live view, and allows external triggers to capture action shots with minimum delay
  • Animate Photo booth screens with full screen  MP4 video behind live view images
  • Multi-Camera Animator can save GIF and MP4 animations with a unique id making it easier to provide privacy when sharing images on a microsite
  • Product name shortened to “Multi-Camera”

New name – same product

Please note that  DSLR Remote Pro Multi-Camera has been shortened to Multi-Camera in this release. It is the same software and registrations for DSLR Remote Pro Multi-Camera issued within the last twelve months still work.

What next..

Learn more about Breeze Multi-Camera software and download a copy of the program to try for yourself.

Breeze Multi-Camera 2.1  is a free upgrade for all registered users of DSLR Remote Pro Multi-Camera who purchased a license on or after  29th November 2017. Customers with older licenses can buy an upgrade license to use this release.

Download Breeze Multi-Camera 2.1           Buy your own license

© Breeze Systems 2018

Getting started – Customizing Breeze print layouts

This video introduces the Breeze Print Layout Editor, and shows simple ways to customize your prints without Photoshop or other image editors.

DSLR Remote Pro, Webcam Photobooth and Hotfolder Prints all include a simple but powerful drag and drop print editor which you can use to customize your prints.

Note: This post was updated in September 2019 for the latest releases of Hotfolder Prints 1.8, and Webcam Photobooth 1.5.

If you are new to DSLR Remote Pro or Webcam Photobooth, first run the Photo booth Setup Wizard.  This creates all the screens for a basic working system. It also creates print layouts with a plain white background. The video demonstrates

  • How to change the background color of your prints
  • How to add logos and other graphic icons to your prints (DSLR Remote Pro 3.12, Hotfolder Prints 1.8 and Webcam Photobooth 1.5)
  • How to add simple captions
  • how to use Breeze tokens to show the correct date on prints
  • How to use Breeze tokens to automatically add the event name to prints (DSLR Remote Pro 3.12 andHotfolder Prints 1.8 only)
  • How to import pre-designed layouts
  • How to add a QR code

Notes

The video is intended to give you a taste of the Print Layout Editor. See the program help files for more details

Using tokens

Find a great video introduction to using tokens with Breeze here

There are minor differences in the way tokens work in these three programs:

  • {eventName} and {dateLess8h} are new in Hotfolder Prints 1.8
  • {eventName} is not yet supported in Webcam Photobooth
  • DSLR Remote Pro Print Layout Editor displays the current value of tokens
  • Hotfolder Prints and Webcam Photobooth Print Layout Editors display the token names in the print layout editor

Importing pre-designed layouts into Breeze

Learn more about using layouts I used in the video here .These free templates were kindly provided by SMOVE for use by Breeze customers.

NB: Logos are not saved in the Photobooth Print Layout (pblt file) in this release. To use both predesigned layout and logos, you need to import the layout before adding the logos to your design.

Try for yourself

Download copies of DSLR Remote Pro, Hotfolder Prints and Webcam Photobooth from our website

If you found this post useful please share it with others.

© Breeze Systems 2018

Breeze DSLR Remote Pro 3.12 released

New in DSLR Remote Pro 3.12 …

  • Support for new mirrorless Canon EOS R camera
  • Add up to 5 logos to prints (png or jpeg)
  • Send emails to multiple email addresses
  • Display both video background and GIF overlay on the same screen
  • live view overlay for video mode
  • much faster upload of images shared by text or Twitter
  • print count resets to initial value for each session

and also

  • fixes issue sharing boomerang GIFs captured in video booth mode (affected 3.11.4 only)

Canon EOS R support

Breeze DSLR Remote Pro 3.12 adds support for Canon’s EOS R mirrorless camera

Add logos to your prints

Logos provide a quick and easy way to add graphics to prints without using an image editor such as Photoshop.

DSLR Remote Pro 3.12 Print Layout Editor
Add up to 5 different png or jpg logos to prints with Breeze DSLR Remote Pro 3.12

Add up to five different logos to a print layout. Logos can be either png or jpg format.

Note: Logos are not saved in the Photobooth Print Layout (pblt file) in this release. To use both predesigned layout and logos, you need to import the layout before adding the logos to your design.

Find out more about the Breeze Print Layout Editor

Automatic reset of print count

DSLR Remote Pro 3.12 print confirmation screen
The print counter will reset to the initial value for each new session

The print counter now automatically resets to the initial value for each photo session

How to get your hands on v3.12

DSLR Remote Pro 3.12 is a free upgrade for all registered users who purchased DSLR Remote Pro after 26th November 2017. Customers with older licenses need to buy an upgrade license to use this release.

Download DSLR Remote Pro 3.12

© Breeze Systems 2018


How to build your own events for Breeze Booth for iPad

This post explains how to create and edit your own  events for Breeze Booth for iPad using the Breeze Booth Event Editor on a Windows PC, and covers

  • what’s new in this release
  • how to download, install and run the event editor on your PC
  • loading a list of existing events into the event editor
  • creating a new event
  • linking an event to it’s asset folder(s)
  • portrait and landscape events
  • editing an event
  • transferring events to your iPad(s)

December 22nd: I have updated the section Method 1: Sync via Dropbox adding more detail to make it easier to follow.

Breeze Booth Event Editor v1.0 beta 20181116 works with Breeze Booth for iPad beta build 20, and was released on November 16th, 2018

Introduction

The Breeze Booth Event Editor is a powerful Windows based program which can be used to create and edit events for Breeze Booth for iPad.

Do join the beta program and explore Breeze Booth for iPad before using the editor. Play with ‘Designer‘ (the first event) to get a feel for what you can achieve with Breeze Booth for iPad.

New in this release…

  • Installer – easier to download and install the Event Editor on your computer
  • Sample events are automatically downloaded and copied into PC Documents folder – no need to unzip them
  • Menu screens to select styles, mirroring, virtual props etc (less need for profiles)
  • Support for choice of up to 10 different virtual props
  • Ability to add logos and resize, rotate and position them in the print layout
  • Updated sample events

Download and install Breeze Booth Event Editor

Breeze Booth Event Editor runs on a Windows 10, 8 or 7 computer. Download it from here.

You will also automatically download the designs  for nine  sample events we provide for Breeze Booth for iPad. When you install the event  editor, these files will automatically be saved in your Documents folder as shown here

C:\Users\sue\Documents\Breeze Booth for iPad\events

The Breeze Booth Event Editor installer will create this folder of sample events. C:\Users\sue\Documents\Breeze Booth for iPad\events

The first event is called Designer and showcases many of the features included with Breeze Booth for iPad.  You are welcome to use this design (or parts of it) with Breeze Booth for iPad at your own events.

The remaining 8 events are much simpler. They are intended to help you create your own designs.

This post will show you how to copy one of these simple events (Photos with virtual props) and edit it for your own use.

Photos with virtual props takes one photo and shares it on a custom background. Guests choose between 3 virtual props. They can also choose whether to shoot in color, B&W, sepia, comic effect or using a filter. The photo can be shared by email .

Copy the asset folders from Photos with virtual props

Start by copying the Photos with virtual props folder to a new folder called My virtual props event

Creating a new assets folder for a new event

Run Breeze Booth Event Editor

Start the Event Editor, and select Open.

Open the Breeze Booth Event Editor

Load the list of existing events by selecting events.xml

Select events.xml to load the list of events into Breeze Booth Event Editor

Initial list of sample events displayed in BBEE

Initial sample events folder (Breeze Booth Event Editor) Note: this list of events was created from the events.xml file we opened

Create a new event ‘My virtual props event

Select New event to create your new event..

This slideshow requires JavaScript.

1) Give the new event a name

2) Add a description

3) Select the landscape version of ‘My virtual props event, by

4) finding the correct folder, opening it and

5) selecting settings.xml

6, 7, 8, ) Repeat for the portrait version of My virtual props event

 9) Save your new event

Portrait, landscape or both?

Breeze Booth for iPad lets guests switch between portrait and landscape orientation on the fly (great for roaming booths like the Ring Roamer).  My virtual props event can  be used in both portrait and landscape orientation, so has designs for both.

If you will always run an event in the same orientation, you don’t need to create both designs.

Editing an event

Select an event and choose Edit event..

We will just edit the portrait version of My virtual props event (10) today. Click on the portrait  Edit button:

Editing the portrait version of My virtual props event

This brings us to the Photo Booth Settings screen, where you can start to customize your design

Tabs on Photo Booth Settings screen (Breeze Both for iPad build 20)

The original Photos with virtual props takes one photo and shares it on a colored background with a custom logo. Guests choose between 3 virtual props. They can also choose whether to shoot in color, B&W, sepia, comic effect or using a filter. The photo can be shared by email .

We are going to change My virtual props event to

  • take 2 square photos
  • remove the branded background print layout
  • add a new background color, 2 logos* and a caption to the print layout
  • create a slideshow GIF from the 2 photos
  • customize the wording of the email
  • share the slideshow GIF instead of the print layout

*You can add up to 5 different png or jpg logos to each print layout in addition to the background and overlay. This is a simple way of branding a design for a particular event, and can also be used as a quick way to add an image of the bride and groom (taken earlier in the day) to wedding photo booths.

Photo Booth Settings Screen

The Photo Booth Settings Screen is displayed for the profile you selected.  It has 5 tabs : General, Photos, Slideshow GIFs, Burst GIFs, and Share. You can access powerful editors  to design your screens, prints and GIFs from these settings.

Photo Booth Settings – General tab

11) Change the aspect ratio of the photos to square

Breeze booth Event Editor Phoot Booth Settings General tab
Changing the photo aspect ratio to square (Breeze booth Event Editor)

You can find a full list of Breeze Booth for iPad screens here

Photo Booth Settings – Photos tab

12) Change the number of photos to 2

13) Change the countdown text color to black

14) Open the Print Layout Editor

Breeze Booth Event Editor Photo Booth Settings Photos tab
Changing the number of photos, color of countdown text and opening the Print Layout editor in Breeze Booth Event Editor

Print Layout Editor

Use the Print layout editor to customize your prints. In the slideshow below I will:

15) Remove the branded background

16) Add a new background color to the print

17) Change the printed photo to a square

18) Right click on the background to add the second photo

19) Resize and reposition the two photos

20) Add the two logos

21) Right click on the background to add a caption, then right click again to edit it

22) Save my changes

Note: You can add up to 5 different JPG or PNG logos to a print

This slideshow requires JavaScript.


Photo Booth Settings – Slideshow GIFs tab

Check Create animated GIF,... to create an animated GIF from the two photos

Breeze Booth Event Editor Photo Booth Settings Slideshow GIFs tab
Creating a slideshow GIF from the photos

Photo Booth Settings – Share tab

23) Check Share slideshow first to share the GIF instead of a print layout

24) Open the slideshow email editor to customize the message

Breeze Botoh for iPad Photo Booth Settings Share tab
Telling Breeze Booth for iPad to share the slideshow GIF


Breeze Booth Event Editor altering email content
Breeze Booth Event Editor email editor for slideshow GIFs

Change the subject and email text. You can use Breeze tokens (25) in emails

Before you leave the event editor….

When you have finished editing the event, check OK to save all your changes. You will need to update the list of events (events.xml), the manifest for My virtual props event  (manifest.xml) , and the settings file for the event (settings.xml)

This slideshow requires JavaScript.

Add an extra countdown GIF and sharing screen to the asset folder

The new event includes has two photos instead of one so we need a second countdown GIF 2.gif . We also need a screen called share_slideshow.jpg to share the new slideshow GIF.

I have copied the existing 1.gif and share.jpg screens to 2.gif and share_slideshow.jpg in C:\Users\sue\Documents\Breeze Booth for iPad\events\My virtual props event\portrait

Content of C:\Users\sue\Documents\Breeze Booth for iPad\events\My virtual props event\portrait
C:\Users\sue\Documents\Breeze Booth for iPad\events\My virtual props event\portrait showing 2.gif and share_slideshow.jpg

When you make any changes to this folder you must also go back to the Breeze Booth Event Editor and regenerate the manifests

Regenerating the manifests in Breeze Booth Event Editor

Copying events from a PC to your iPads

There are currently 3 ways to copy events from your PC to an iPad:

Method 1: Sync via Dropbox

  • Install the official DropBox app on your iPad (this can be downloaded from the Apple App Store).
  • Select Sign in to Dropbox in Breeze Booth for iPad’s app settings and authorize the app. This will create a “Breeze Booth for iPad” folder in your DropBox “Apps” folder.

    This slideshow requires JavaScript.

  • Now on your PC copy the whole Breeze Booth for iPad folder

from C:\Users\yourname\Documents\Breeze Booth for iPad

Copying the whole Breeze Booth for iPad folder

to C:\Users\yourname\Dropbox\Apps

Dropbox folder structure for events

Note: When you sync the events using Dropbox on your iPad, the program will look for this folder. You must name it correctly, or the App will not find your events.

  • As there are several ways to sync events, you need to tell your iPad which to choose. In Breeze Booth for iPad go to Settings and select the Sync via Dropbox.

    This slideshow requires JavaScript.

Method 2: Sync via a secure https web server

Upload the events folder to a folder on a web server, then go the to the settings screen in Breeze Booth for Ipad and edit the URL for the sync server to point to this folder. Then use the events screen in Breeze Booth for iPad to sync the events.
Important: This method can only be used with secure servers that have https e.g. https://breezesys.com. It will not work with http URLs.
Sample events are available by setting the sync server to https://bb4ipad.com/sync in the iPad’s app settings.

Method 3: Copy the files via iCloud

Copy the event folder to a folder on iCloud that is visible on the iPad. Then use the Files app to copy the files to Breeze Booth for iPad’s assets folder.

Update Breeze Booth for iPad to use the new event

Before you can run a new event on an iPad, Breeze Booth for iPad needs to update it’s list of events. Once My virtual props event has been added to this list, sync the event to download the new assets and xml files

Synching an event in breeze Booth for iPad

Syncing the iPad is covered in more detail here

Printing your photos

You can print using AirPrint or Breeze Hub

Breeze Booth for iPad Settings screen
Using AirPrint to print directly from Breeze Booth for iPad

25) To print directly from the iPad connect up your printer ( which must support AirPrint) and choose Print using Airprint on the Breeze Booth for iPad Settings screen

26) To print using a Windows PC you need Breeze Hub.  Choose Connect to Breeze Hub on the Breeze Booth or iPad Settings screen

Summary

This has been quite a marathon post. I have outlined the new features in Breeze Booth Event Editor, how to download and install this program on your PC, how to create your own event based on one of the samples provided by Breeze, and how to download the new event to use on your iPads.

If you found this post useful please share it with others.

Thanks,

Sue

© Breeze Systems 2018

Greenscreen Gifs with animated backgrounds and overlays

Have you tried Breeze transparent greenscreen? It’s a great way to make your GIFs stand out.

This tutorial assumes you can already shoot simple green screen photo booth images with DSLR Remote Pro, and explains how to add animated backgrounds and overlays  to a slideshow GIF.

Usually when you shoot in greenscreen, each photo is saved with a single green screen background. Transparent greenscreen removes the background from an image and stores it as a png with a transparent background. This lets you add a variety of backgrounds later.

Selecting transparent greenscreen processing in Breeze DSLR Remote Pro 3.11.4


The original photo is shot against a greenscreen background


DLSR Remote Pro removes the green background and saves the photo on a transparent background

Breeze lets you combine these images into a slideshow GIF which has an animated background.

Add the GIF backgrounds

To make a slideshow GIF with an animated background,  you need to add a series of GIF backgrounds to your PhotoBoothImages folder.

My GIF has 3 photos. Each of these photos will have 3 different background images.

9 GIF backgrounds in the PhotoBoothImages folder (Breeze DLSR Remote Pro 3.11.4)

The background images are named GIF_background_1.jpg through to GIF_background_9.jpg

Add the GIF overlays

My GIFs will  have 9 overlays called GIF_overlay_1.png through to GIF_overlay_9.png

9 GIF overlays in the PhotoBoothImages folder (Breeze DLSR Remote Pro 3.11.4)

Add the on-screen background

To keep things simple I am using 1 still background image for the on screen preview. This is called greenscreen_background.jpg as usual.

Greenscreen background image in the PhotoBoothImages folder (Breeze DLSR Remote Pro 3.11.4)

Select your animated GIF settings

First enable animated GIFs .  How to make slideshow GIFs

  1. There are 3 backgrounds and overlays for each photo
  2. Each photo will be shown for one second
  3. The GIF will be displayed for at least 3 seconds

Printing transparent greenscreen images

The photos are saved with transparent backgrounds, so you can print them against a white background, or on a single background image. The images can be a different color from the background.

This slideshow requires JavaScript.

Learn more

Thank you for taking the time to read this post.

Sue

© Breeze Systems 2018

How to brand and animate Breeze welcome screens

This post explains how to add a custom attraction or standby screen to  DSLR Remote Pro. Breeze calls this a welcome screen.

Use your welcome screen to attract people to your booth, as a quick method of branding, and to protect your camera*. The welcome screen can be a still image, animated GIF or video. You can add sound to attract people’s attention.

*Running live view for long periods drains battery power and can cause the camera’s sensor to heat up. If the photo booth is idle Breeze  automatically cancels the live view and displays the welcome screen.

This post shows how to replace the standard welcome screen with a movie or your own still image. You can customize Webcam Photobooth in the same way.

Breeze Multi-Camera has a similar screen called standby.jpg which can be customized and animated in a similar way.

Note: This post was updated in September 2019 to make it clearer that you need to set the inactivity timeout value

Get started

You can use the photo booth setup wizard to create a working set of screens for your booth.

Default screen set created by the photo booth setup wizard, showing the initial attraction screen welcome.jpg (DSLR Remote Pro 3.11.4)

Add a custom welcome screen

Rename the original welcome.jpg in case you want to use it again. (Mine is called welcome-old.jpg.)

Copy your new image into the same folder, and call it welcome.jpg To fill the screen, make the new image the same size in pixels as the image it replaces.

Shows PhotoBoothImages folder with custom welcome.jpg in DSLR Remote Pro 3.11.4
Paste a new welcome.jpg into your PhotoBoothImages folder. This should be the same size (in pixels) as the original (DSLR Remote Pro 3.11.4)

Inactivity timer

To control how long the booth waits before going into standby mode and displaying the welcome screen, adjust the inactivity timer. Go to Advanced Settings, and set the number of seconds you want to wait until the booth goes into standby mode:

Shows how to set the inactivity time in DSLR Remote Pro 3.11.4
Setting the inactivity time in DSLR Remote Pro 3.11.4

Run the booth, wait a while for it to go into idle mode and your welcome screen will be displayed.

Add a welcome screen with a movie

Add your movie to the PhotoBoothImages folder and name it welcome_loop.mp4 if you want the movie to loop, or welcome.mp4 to run it just once.

Note: You need both the background image ( welcome.jpg) as well as the animation in the PhotoboothImages folder. The background image is often plain black (mirror booths) or a copy of the first frame of your movie. It may appear briefly before the animation starts running.

PhotoBoothImages folder with attraction movie
Here a movie called welcome_loop.mp4 has been added to the PhotoBoothImages folder (DSLR Remote Pro 3.11.4)

That’s it! Start DSLR Remote Pro and check everything is working. You will need to wait for the inactivity timer to kick in before you see your video.

Finer details

What happens if my video is smaller than the screen?

If your video is smaller than your screen, it will be displayed in the center of the screen with your welcome.jpg behind it:

Showing video small than screen in Breeze DSLR Remote Pro 3.11.4
Here the attraction video is smaller than the screen (DSLR Remote Pro 3.11.4)

Can I add GIFs, sound and .MOV movies?

Yes. See the program help files for details

Can I customize the other screens in my booth?

Yes, you can customize most other screens in the same way. Replace the original screen in your PhotoBoothImages folder with another still (.jpg), add a movie (.mp4 or .mov) or GIF file with the same name. For more details, see

Does this work for magic mirrors?

Yes. To add animations and sound to magic mirrors include them in your PhotoBoothImages folder in the same way.

Where can I find animations for my booth/mirror?

There are lots of sources of animations on the web. These are some of the vendors who offer animations and complete Breeze themes for photo booths and mirrors

The movie used here was sourced from Text in Motion , who add your text to their own videos. (Thanks Bob Hajvert for spotting this supplier.)

Breeze Systems is not responsible for the content of external sites.

© Breeze Systems October 2018

Photo Booth Show Europe 2018

There are 80 shopping days until Christmas, but just over a week to the second Photo Booth Show. Have you got your tickets yet?

The 2018 show will be held in Leicester, England on 14th & 15th October. The trade show has expanded into two rooms, with vendors and speakers coming from across Europe, the US and Australia. This is a great opportunity to see what’s new, learn from the experts and other boothers.

Visit the Breeze stand

See the new iPad App, the latest features in DSLR Remote Pro and the new Multi-Camera photo booth mode.

Try out slow motion, add emoji & virtual props to prints, make GDPR compliance simpler. Experiment with 3D ‘bullet time’ activation, and have a sneak preview of the next Multi-Camera release.

Here’s just a taste of the changes to Breeze products since last year’s show.

DSLR Remote Pro

  • Virtual props and emoji
  • Slow motion
  • Video sharing
  • Faster,  comprehensive branding
  • Generate sets of custom photo booth screen backgrounds from a single image.
  • Breeze themes – buy them from third party vendors, design your own, transfer between PCs with different screen size/aspect ratio
  • Custom caption sets in almost any language
  • Green screen improvements
  • Print counters
  • Information screens for GDPR privacy notices

Multi Camera

  • New photo booth mode
  • Simpler, faster camera calibration
  • add soundtrack to MP4 videos
  • support for new cameras


Who is flying in to speak at the show on Tuesday afternoon?

Looking forward to seeing you all

Sue & Chris

Powerful reliable & flexible software for event photographers

%d bloggers like this: